Halloween Charcuterie Board
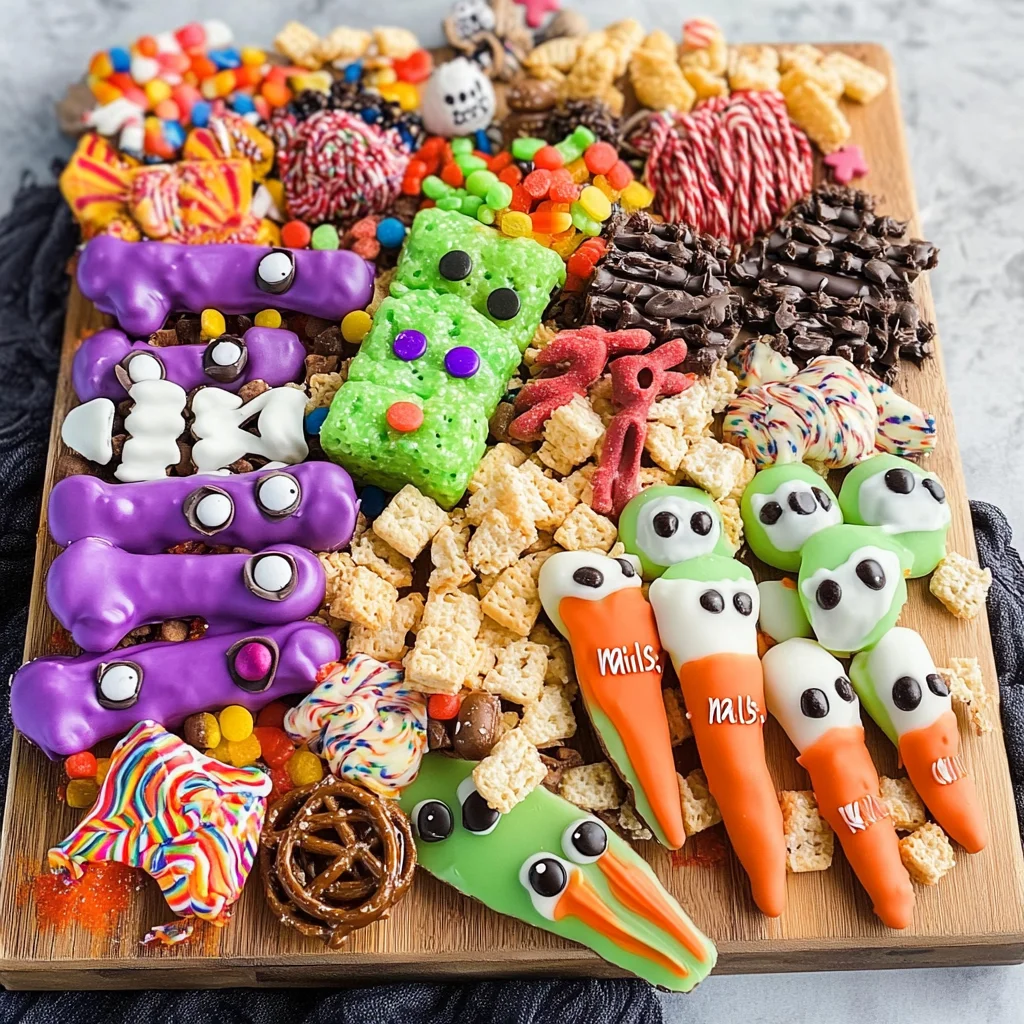
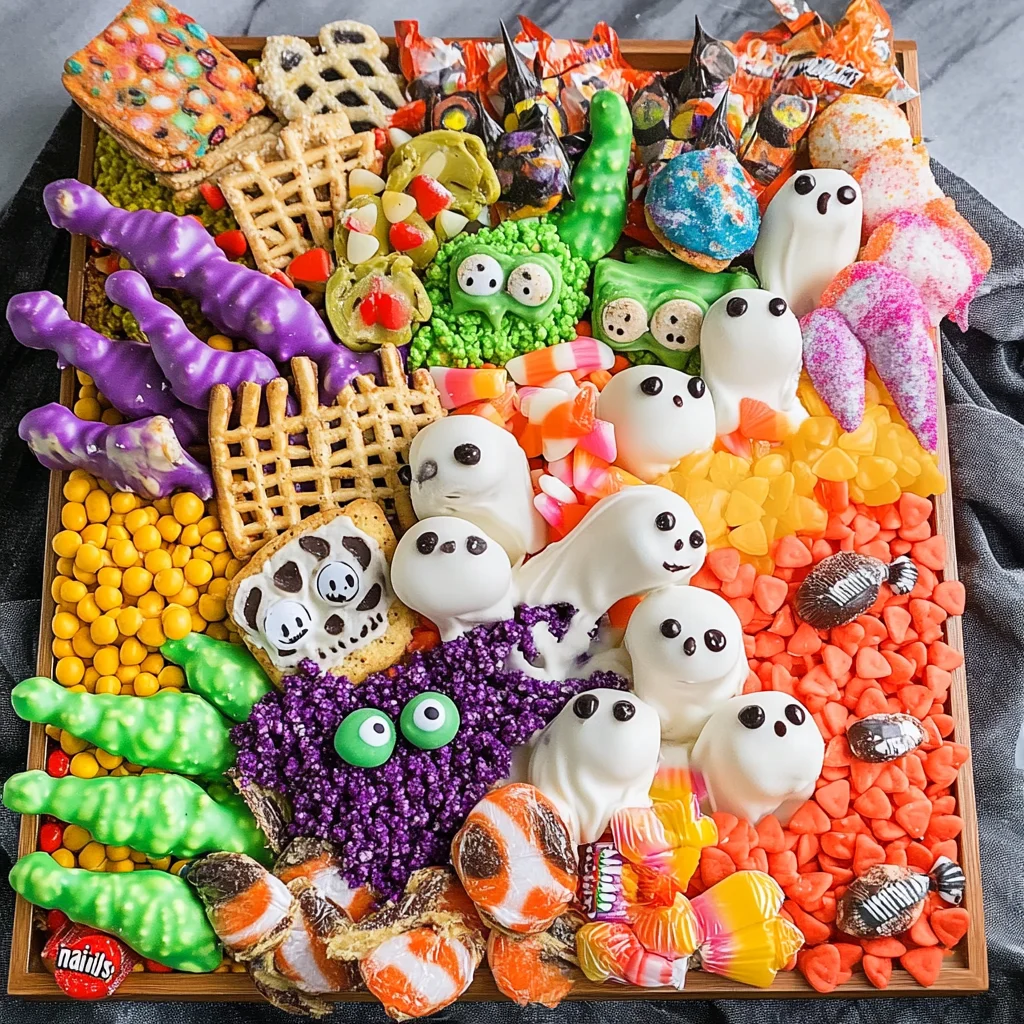
If you’re looking for a fun and festive way to celebrate Halloween, this Halloween Charcuterie Board is just the treat you need! It’s not only loaded with colorful candy and chocolate-dipped “creatures,” but it also features a playful skeleton centerpiece that will delight both kids and adults alike. This recipe is close to my heart because it brings everyone together, making it perfect for busy weeknights, family gatherings, or even a cozy movie night with friends.
Creating your own Halloween Charcuterie Board is simple and allows for creativity. You can scale it up or down based on your party size, and the best part? Kids absolutely love getting involved in the preparation!
Why You’ll Love This Recipe
- Easy to Prepare: You don’t need to be a culinary expert to whip this up; it’s all about assembling fun elements!
- Kid-Friendly Fun: With colorful candies and adorable treats, kids will love helping out—and eating!
- Scalable for Any Occasion: Whether it’s a small gathering or a big bash, you can easily adjust the quantities.
- Visually Stunning: The vibrant colors make for an eye-catching centerpiece that will impress your guests.
- Deliciously Sweet: Packed with all kinds of treats, it’s sure to satisfy any sweet tooth!
Ingredients You’ll Need
For this delightful Halloween Charcuterie Board, you’ll only need some simple, wholesome ingredients that are easy to find. Let’s gather what we need:
For the Treats
- 8 rice krispie treats
- 5 ounces white chocolate melting wafers
- purple food dye
- candy eyes
- purple sprinkles
- 8 pretzel rods
- 10 ounces white chocolate melting wafers
- green food dye
- sliced almonds
- 8 Nutter Butter cookies
- 5 ounces white chocolate melting wafers
- mini chocolate chips
- 8 Mini Reese’s Cups
- 8 Oreo Thins
- candy eyes (again)
For the Candy Fillings
- 18 ounces Smarties
- 16 ounces red licorice
- 15 ounces Assorted Hershey’s Candy
- 28 ounces sour pectin-based gummy candies
- 40 ounces candy corn
Variations
This recipe is wonderfully flexible! Here are some creative variations you might enjoy:
- Change Up the Candies: Feel free to swap in your favorite candies—add gummy worms or spooky marshmallows for extra fun!
- Use Different Colors: Customize your board by using different colors of food dye in your melting wafers—think orange for pumpkins!
- Add Fresh Fruits: For a healthier twist, include some fresh fruits like grapes or apple slices alongside the sweets.
- Create Themed Shapes: Instead of traditional shapes, try cookie cutters to create spooky shapes from brownies or cookies.
How to Make Halloween Charcuterie Board
Step 1: Make the Monster Treats
To kick things off, melt the white chocolate wafers according to package instructions. Stir in some purple food dye until you achieve your desired shade. Dip one side of each Rice Krispie Treat into the melted chocolate. Add candy eyes on top of the chocolate as well as purple sprinkles to mimic hair. Place them on a parchment-lined pan to allow the chocolate to set.
Step 2: Create the Witch Fingers
Next, let’s whip up some Witch Fingers! Melt more white chocolate wafers and mix in green food dye. Pour this mixture into a tall cup for easy dipping. Dip each pretzel rod into the melted chocolate and place a sliced almond at one end to represent a fingernail. Again, set these on parchment paper so they can firm up nicely.
Step 3: Assemble the Ghosts
Now onto our ghostly treats! Melt another batch of white chocolate wafers and dip one side of each Nutter Butter cookie into this deliciousness. Use mini chocolate chips for eyes and mouths—two for eyes and one for a mouth. Like before, set these on parchment paper while they cool.
Step 4: Crafting Bats
Let’s make some adorable bats! Unwrap Mini Reese’s Cups but leave their inner lining intact. Open each Oreo cookie and scrape out the cream filling (don’t toss it!). Break each Oreo in half to create wings. Spread some of that delicious cream filling onto each Reese’s Cup and attach cookie halves as wings. Secure with more cream filling where needed and add candy eyes.
Step 5: Assemble Your Board
Now comes the fun part! Start by placing your skeleton diagonally across your serving board; fill its rib cage with all those delightful candies. Next, arrange your larger decorated treats around it before filling in any gaps with more colorful candies.
Step 6: Final Touches
Take a step back and admire your creation! Feel free to add more candy if you see any empty spaces—this board should look as festive as possible!
Now you’re ready to enjoy this spooky yet sweet Halloween Charcuterie Board with family and friends! Happy haunting!
Pro Tips for Making Halloween Charcuterie Board
Creating the perfect Halloween charcuterie board is all about creativity and fun! Here are some tips to help you craft an eye-catching and delicious spread.
-
Plan Your Layout: Before assembling, envision your board. A balanced layout helps create visual appeal and makes it easier for guests to grab treats.
-
Mix Textures and Colors: Incorporate a variety of textures (crunchy, chewy, creamy) and colors. This not only makes your board more visually interesting but also enhances the tasting experience.
-
Use Seasonal Decorations: Incorporate small pumpkins or decorative skulls around the board. This adds thematic elements that highlight the Halloween spirit.
-
Keep It Kid-Friendly: Ensure that all items are suitable for children by avoiding any choking hazards or overly spicy ingredients. This way, everyone can enjoy the festivities!
-
Make Ahead of Time: Prepare some of the treats in advance and store them properly. This reduces stress on party day and allows you to focus on enjoying time with your guests.
How to Serve Halloween Charcuterie Board
Presenting your Halloween charcuterie board is just as important as making it! Here are some creative ideas to make your display stand out.
Garnishes
- Fresh Herbs: Sprigs of mint or rosemary can add a touch of freshness and contrast beautifully against the colorful candies.
- Edible Flowers: Delicate edible flowers can bring a whimsical touch to your board, enhancing both its appearance and flavor.
- Themed Napkins: Use napkins or plates featuring spooky designs to tie the entire theme together seamlessly.
Side Dishes
- Veggie Platter: Crunchy veggies like carrots, celery, and bell peppers with a dip make for a refreshing contrast to the sweetness of the board.
- Popcorn: Sweet or savory popcorn can be a fun addition—consider pumpkin spice or caramel flavors for a festive twist!
- Fruit Skewers: Fresh fruit on skewers offers a juicy bite that complements all the sugary treats while adding brightness to your platter.
- Cheese Platter: A selection of cheeses such as cheddar or gouda can balance out the sweetness of candy with their savory richness, making for a well-rounded snack table.
With these serving suggestions and pro tips at hand, you’re all set to impress your guests with a delightful Halloween charcuterie board that’s as fun to look at as it is to eat! Enjoy every spooky moment!
Make Ahead and Storage
This Halloween Charcuterie Board is not only a fun and festive treat, but it’s also perfect for meal prep! You can easily assemble many elements ahead of time, making your party planning a breeze.
Storing Leftovers
- Store any leftover treats in an airtight container at room temperature.
- Keep the chocolate-dipped items separate to prevent them from becoming soggy.
- Enjoy leftovers within 3-4 days for the best flavor and texture.
Freezing
- While it’s best enjoyed fresh, you can freeze some components.
- Individually wrap chocolate-dipped treats in plastic wrap and then place them in a freezer-safe bag.
- Thaw in the refrigerator overnight before serving.
Reheating
- For any chocolate that may have set too hard, briefly warm it in the microwave for about 10-15 seconds before serving to soften.
- Ensure not to overheat, as this can affect the texture and taste.
FAQs
Here are some frequently asked questions about the Halloween Charcuterie Board.
Can I customize my Halloween Charcuterie Board?
Absolutely! Feel free to swap out candies or add your favorite treats. The key is to keep it colorful and fun!
How do I make the Halloween Charcuterie Board kid-friendly?
This recipe is already designed with kids in mind! Just ensure to use safe, non-allergenic ingredients for children who may have dietary restrictions.
What is a Halloween Charcuterie Board?
A Halloween Charcuterie Board is a creative spread of various sweets and treats styled in a spooky theme, perfect for Halloween gatherings!
How long does it take to prepare the Halloween Charcuterie Board?
The total preparation time for this board is around 120 minutes, which includes making all the fun treats!
Final Thoughts
I hope you have as much fun making this Halloween Charcuterie Board as I did creating it! It’s such a delightful way to celebrate this spooky season with family and friends. Get creative with your favorite candies, enjoy the process, and watch everyone light up with joy as they indulge in these tasty treats. Happy Halloween!
Halloween Charcuterie Board
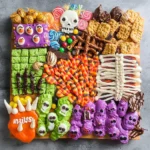
Create a spooktacular Halloween Charcuterie Board that will delight both kids and adults alike! This vibrant spread is packed with a variety of colorful candies and creatively crafted treats, making it the perfect centerpiece for your Halloween festivities. The hands-on preparation allows everyone to get involved, making it ideal for family gatherings or cozy movie nights with friends. With its playful skeleton centerpiece and delightful sweets, this treat board is sure to be a hit at any celebration.
- Prep Time: 60 minutes
- Cook Time: None
- Total Time: 0 hours
- Yield: Serves approximately 10 people 1x
- Category: Dessert
- Method: Assembling
- Cuisine: American
Ingredients
- 8 rice krispie treats
- 5 ounces white chocolate melting wafers
- purple food dye
- candy eyes
- purple sprinkles
- 8 pretzel rods
- 10 ounces white chocolate melting wafers
- green food dye
- sliced almonds
- 8 Nutter Butter cookies
- mini chocolate chips
- 8 Mini Reese's Cups
- 8 Oreo Thins
- 18 ounces Smarties
- 16 ounces red licorice
- 15 ounces Assorted candy
- 28 ounces pectin-based gummy candies
- 40 ounces candy corn
Instructions
- For Monster Treats, melt white chocolate wafers with purple dye, dip Rice Krispie treats, decorate with candy eyes and sprinkles, and set on parchment.
- For Witch Fingers, dip pretzel rods in melted green chocolate, add sliced almonds as fingernails, and cool.
- For Ghosts, dip Nutter Butter cookies in white chocolate, use mini chocolate chips for facial features.
- Assemble bats using Mini Reese's Cups and Oreo halves for wings; attach eyes with cream filling.
- Arrange all treats on a serving board with your skeleton centerpiece and fill gaps with assorted candies.
Nutrition
- Serving Size: 1/10 of the board (approximately 150g)
- Calories: 320
- Sugar: 50g
- Sodium: 90mg
- Fat: 15g
- Saturated Fat: 9g
- Unsaturated Fat: 4g
- Trans Fat: 0g
- Carbohydrates: 46g
- Fiber: 2g
- Protein: 3g
- Cholesterol: 5mg