Monster Oreo Pops
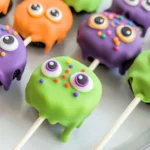
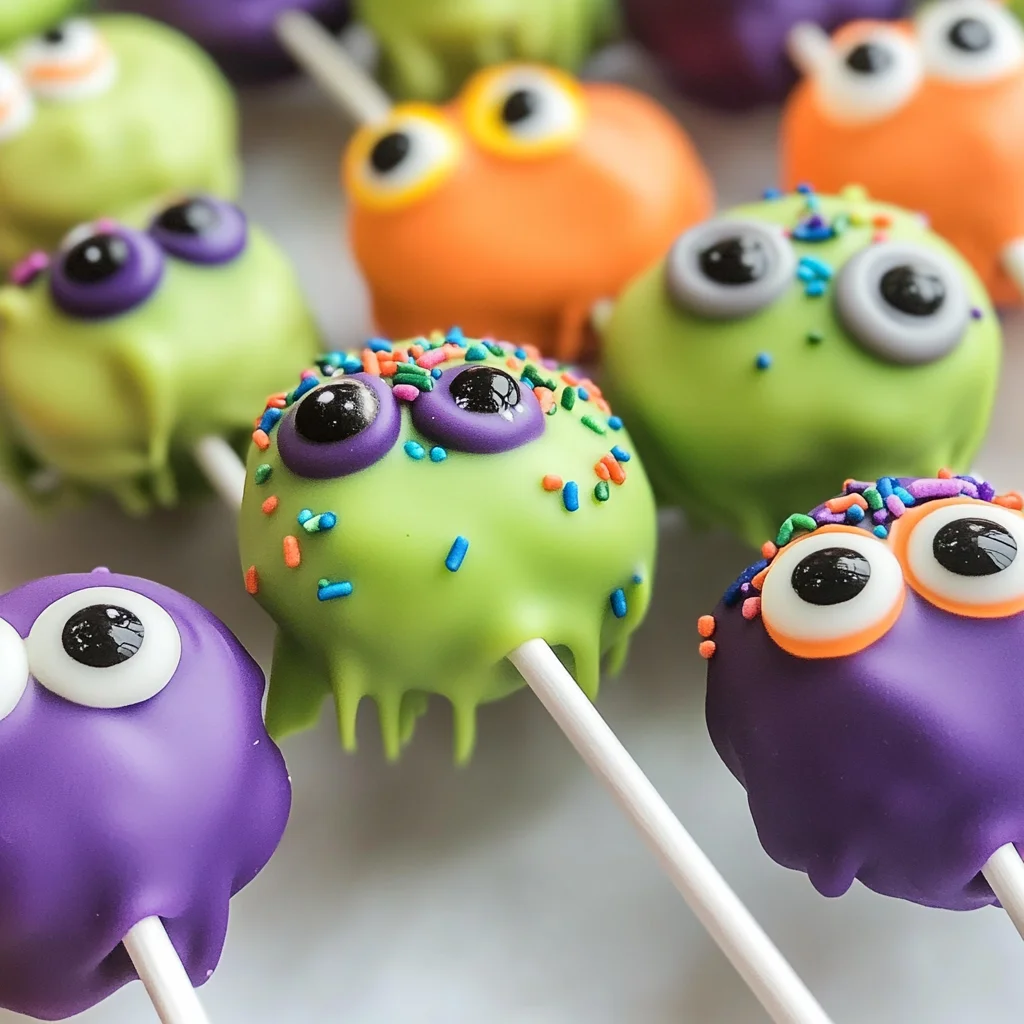
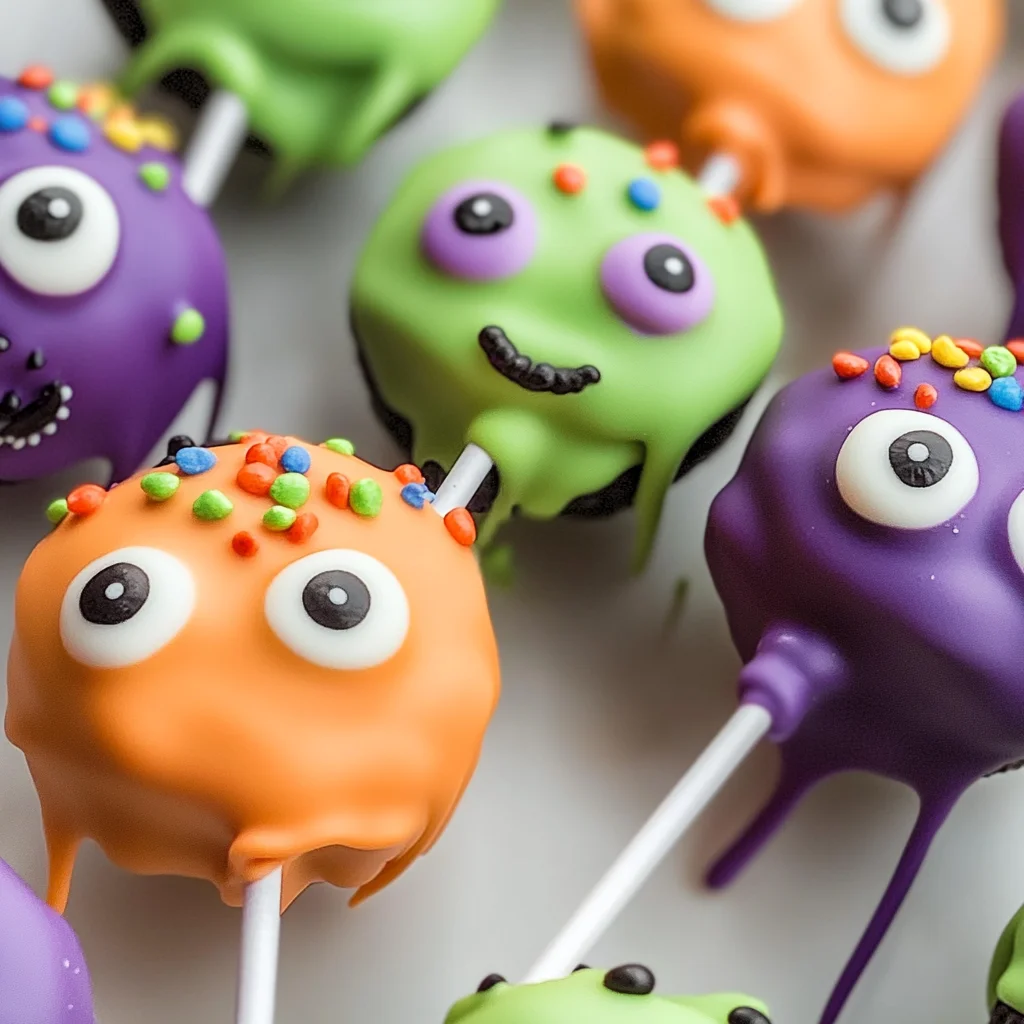
If you’re looking for a fun and festive treat, these Monster Oreo Pops are just what you need! Perfect for Halloween gatherings, kid’s parties, or even just a cozy night in with loved ones, these delightful pops are a hit with both kids and adults alike. The combination of creamy Oreos, vibrant candy melts, and playful decorations makes them not only delicious but also an enjoyable project to create together.
This recipe is special to me because it brings back treasured memories of crafting spooky treats with friends and family. Plus, they’re no-bake, which means less time in the kitchen and more time enjoying those sweet moments!
Why You’ll Love This Recipe
- Super easy to make: With simple steps and no baking required, even little hands can help!
- Family-friendly fun: Everyone loves Oreos! Decorating these pops will bring smiles all around.
- Customizable colors: You can mix and match colors for any occasion—think holidays or birthday parties!
- Make ahead: These treats can be prepared in advance and stored in the fridge until you’re ready to serve.
Ingredients You’ll Need
Let’s gather our ingredients! This recipe uses simple, wholesome components that you can easily find at your local grocery store. Here’s what you’ll need to whip up these delightful Monster Oreo Pops:
- 24 Double Stuffed Oreos
- ½ cup white chocolate melting wafers
- 12 ounces green candy melts
- 12 ounces purple candy melts
- 12 ounces orange candy melts
- 3 Tablespoons Crisco shortening (divided)
- Green, purple, and orange jimmy sprinkles (long not round)
- Candy eyes (multiple sizes)
- 24 Cake pop sticks
Variations
The best part about these Monster Oreo Pops is how flexible the recipe is! Feel free to mix things up a bit based on your preferences or what you have at home. Here are some fun ideas:
- Change the flavors: Swap out Double Stuffed Oreos for regular ones or try other cookie flavors like mint or peanut butter!
- Use different colors: Get creative with your candy melts—choose whatever colors you love or fit your party theme.
- Add toppings: Instead of sprinkles, use crushed candies or nuts for extra texture and flavor.
- Try different eyes: Use chocolate chips or gummy candies instead of candy eyes for a unique twist!
How to Make Monster Oreo Pops
Step 1: Prepare the Sticks
Start by taking each cake pop stick and gently poke a hole about ½ inch deep into the Oreo filling. Be careful here; we want to maintain the integrity of the wafer while making space for our stick. Don’t leave the stick inside just yet; this step helps ensure that your pops will hold together nicely later.
Step 2: Melt the White Chocolate
In a small microwave-safe bowl, add the white chocolate melting wafers. Heat them on 50% power for one minute. Give them a stir and return them to the microwave for additional bursts of 30 seconds, stirring between each burst until it’s silky smooth. This melted chocolate will act as our adhesive when we insert the sticks into the Oreos.
Step 3: Insert the Sticks
Dip the tip of each cake pop stick (about ½ inch deep) into your melted white chocolate. Then carefully place it into the hole you made earlier in each Oreo. Repeat this process for all Oreos and let them rest until the chocolate hardens. This step is crucial because it keeps your pops from falling apart later.
Step 4: Melt Your Candy Coatings
Next, add your colored melting wafers into small microwave-safe containers—glass tumblers are perfect! Heat on 50% power or defrost mode for one minute. Stir with a fork, then add one tablespoon of Crisco to each container before returning them to the microwave in short bursts until smooth and silky. The consistency should be like dressing; this helps create an even coating over your Oreos.
Step 5: Dip Those Oreos!
Now comes the fun part—dipping! Carefully dip each Oreo into your melted colored chocolate deep enough to cover the entire cookie. You might need to move the cake pop stick side to side gently so that it gets fully coated. Let any excess chocolate drip off before moving on.
Step 6: Decorate with Sprinkles
Right after dipping, while that chocolate is still wet, go wild adding sprinkles and candy eyes! You can arrange them however you like—let your imagination take flight!
Step 7: Chill Before Serving
Finally, let your monster pops rest upright using a cake pop stand in the refrigerator for about 30 minutes before serving. This helps everything set perfectly so they’re ready to enjoy when it’s time to celebrate!
Pro Tips for Making Monster Oreo Pops
Creating your own Monster Oreo Pops is not only fun but also a great way to unleash your creativity! Here are some handy tips to ensure your treats turn out perfectly.
-
Use Quality Melting Wafers: Opt for high-quality melting wafers for a smoother coating. This will give your pops a shiny finish and enhanced flavor, making them more appealing.
-
Ensure Even Coating: When dipping the Oreos, rotate them gently to ensure an even coat of chocolate. This prevents any drips and creates a professional-looking pop.
-
Experiment with Designs: Don’t hesitate to mix and match colors and sprinkle patterns. Letting your imagination run wild can lead to some truly unique and eye-catching Monster Pops!
-
Chill Before Serving: Allowing the pops to chill in the fridge not only helps them set but also makes them firmer and easier to handle when serving.
-
Use a Cake Pop Stand: If you don’t have a cake pop stand, you can use styrofoam or even an upside-down muffin tin. This keeps your pops upright while they set, preventing any smudging or mess.
How to Serve Monster Oreo Pops
Serving these delightful Monster Oreo Pops can be just as fun as making them! Here are some ideas on how to present these spooky treats at your next gathering.
Garnishes
- Edible Glitter: A sprinkle of edible glitter can add an extra touch of magic, making your pops sparkle under festive lights.
- Colored Sugar: Use colored sugar that matches the candy melts for a cohesive look. It adds texture and enhances visual appeal.
Side Dishes
- Fruit Skewers: Fresh fruit skewers made with seasonal fruits like apples, grapes, and strawberries provide a refreshing contrast to the sweetness of the Monster Pops.
- Veggie Platter: A colorful veggie platter with dips like hummus or ranch dressing offers a healthy option that balances out the indulgence of dessert.
- Popcorn Bar: Set up a popcorn bar with various toppings (like caramel, cheese powder, or chocolate drizzle) so guests can create their own customized popcorn treat.
- Themed Cupcakes: Bake or buy cupcakes decorated with Halloween themes (think ghostly frosting or pumpkin sprinkles) that pair perfectly with the fun spirit of these monster treats.
Now you’re all set to impress friends and family with your adorable Monster Oreo Pops! Happy baking!
Make Ahead and Storage
These Monster Oreo Pops are not only a delightful treat but also a fantastic option for meal prep! You can make them ahead of time for parties, school events, or just to satisfy your sweet tooth throughout the week.
Storing Leftovers
- Keep leftover Monster Oreo Pops in an airtight container.
- Store them in the refrigerator for up to one week.
- Ensure they are separated by parchment paper to prevent sticking.
Freezing
- Wrap each Monster Oreo Pop individually in plastic wrap.
- Place them in a freezer-safe bag or container.
- They can be frozen for up to three months; just thaw in the refrigerator before serving.
Reheating
- There’s no need to reheat these pops as they are best enjoyed chilled!
- If you prefer them at room temperature, simply let them sit on the counter for about 10-15 minutes before indulging.
FAQs
Here are some common questions about making Monster Oreo Pops:
Can I use different colors for the candy melts?
Absolutely! Feel free to get creative with your color choices. Using different colors can add a fun twist to your Monster Oreo Pops!
How do I make sure my Monster Oreo Pops come out perfectly?
To ensure success, make sure your melting wafers and candy melts are at the right consistency. A smooth coating is key to getting that perfect monster look!
What if I don’t have cake pop sticks?
You can use lollipop sticks or even sturdy toothpicks as an alternative if you don’t have cake pop sticks available.
Are Monster Oreo Pops suitable for kids’ parties?
Yes, these fun treats are perfect for children’s parties! They’re colorful, customizable, and sure to be a hit among kids and adults alike.
How can I customize my Monster Oreo Pops?
Customization is endless! You can use different sprinkles, add themed decorations, or even vary the types of cookies if you’re feeling adventurous.
Final Thoughts
I hope you’re as excited as I am to whip up these adorable Monster Oreo Pops! They’re not just a treat; they’re an experience filled with fun and creativity. Whether you’re making them for Halloween or any festive gathering, I’m sure they’ll bring smiles all around. Enjoy the process of making these delightful pops, and don’t forget to share your creations with friends and family. Happy baking!
Monster Oreo Pops
Indulge in the fun of creating Monster Oreo Pops, a delightful treat perfect for Halloween festivities or any playful gathering. These vibrant, no-bake pops combine the classic taste of Oreos with colorful candy coatings and whimsical decorations, making them a hit for kids and adults alike. With simple steps and a bit of creativity, you can decorate these pops to match any theme. The best part? They can be prepared in advance, allowing you to spend less time in the kitchen and more time enjoying sweet moments with loved ones!
- Prep Time: 30 minutes
- Cook Time: 0 minutes
- Total Time: 30 minutes
- Yield: Makes 24 cake pops 1x
- Category: Dessert
- Method: No-bake
- Cuisine: American
Ingredients
- 24 Double Stuffed Oreos
- ½ cup white chocolate melting wafers
- 12 ounces green candy melts
- 12 ounces purple candy melts
- 12 ounces orange candy melts
- 3 tablespoons Crisco shortening (divided)
- Green, purple, and orange jimmy sprinkles
- Candy eyes of various sizes
- 24 cake pop sticks
Instructions
- Prepare each cake pop stick by gently poking a hole about ½ inch deep into the Oreo filling.
- Melt white chocolate melting wafers in the microwave until smooth. Dip the tip of each stick into the melted chocolate before inserting it into the Oreo.
- Melt colored candy melts with Crisco until smooth. Dip each Oreo into the melted candy coating until fully covered.
- Immediately add sprinkles and candy eyes while the coating is still wet.
- Chill upright in the refrigerator for about 30 minutes before serving.
Nutrition
- Serving Size: 1 cake pop (45g)
- Calories: 190
- Sugar: 18g
- Sodium: 60mg
- Fat: 10g
- Saturated Fat: 5g
- Unsaturated Fat: 4g
- Trans Fat: 0g
- Carbohydrates: 23g
- Fiber: 0g
- Protein: 1g
- Cholesterol: 0mg

