The Best Apple Crisp
If you’re looking for a cozy dessert that warms the heart and fills the home with delightful aromas, then you’ve come to the right place! The Best Apple Crisp is not just any dessert; it’s a slice of autumn on a plate. Whenever I make this dish, I’m reminded of family gatherings, laughter around the table, and cool evenings spent under the stars. It’s perfect for busy weeknights when you want something comforting, or for special occasions like Thanksgiving when you want to impress your loved ones.
This recipe is super simple and uses fresh ingredients that you probably already have in your pantry. That means you can whip up this delicious apple crisp anytime the craving strikes!
Why You’ll Love This Recipe
- Easy to Make: With just a handful of ingredients and straightforward steps, you’ll have this delightful dessert ready in no time!
- Family Favorite: Everyone loves warm apples topped with that crunchy oat mixture; it’s sure to be a hit with both kids and adults.
- Perfect for Any Occasion: Whether it’s a casual dinner or a festive gathering, this apple crisp fits right in.
- Make-Ahead Friendly: Bake it ahead of time and simply warm it up before serving—great for those busy days!
Ingredients You’ll Need
Let’s gather some simple, wholesome ingredients that come together beautifully in this recipe. You’ll find that each element plays an important role in creating that perfect balance of sweetness and warmth.
For the Apple Filling
- 5 cups fresh apples (sliced)
- 1/2 cup granulated white sugar
- 1/2 tsp cinnamon
- 1 teaspoon vanilla extract
For the Topping
- 1/2 cup all purpose flour
- 1/3 cup old fashioned oats
- 2/3 cup packed brown sugar
- 1/4 tsp salt
- 1/2 teaspoon cinnamon
- 1/4 cup (1/2 stick) butter (melted)
Variations
One of the best things about The Best Apple Crisp is how flexible it is! Feel free to get creative and add your own twist with these variations:
- Add Nuts: Toss in some chopped walnuts or pecans for an extra crunch.
- Mix in Berries: Combine sliced apples with fresh blueberries or raspberries for a fruity twist.
- Use Different Spices: Try adding nutmeg or ginger to give it a unique flavor profile!
- Gluten-Free Option: Substitute all-purpose flour with your favorite gluten-free flour blend.
How to Make The Best Apple Crisp
Step 1: Preheat Your Oven
Start by preheating your oven to 350 degrees. This step is crucial because it ensures even baking once you pop your crisp in. A hot oven will help caramelize the sugars in the apples, making them sweet and tender.
Step 2: Prepare the Apples
In a large bowl, combine those lovely sliced apples with granulated sugar, cinnamon, and vanilla extract. This mixture not only flavors the apples but also creates a luscious syrup as they bake. Once everything is coated nicely, pour it into your greased baking dish.
Step 3: Make the Topping
In another bowl, mix together flour, oats, brown sugar, salt, and more cinnamon. Pour in melted butter and stir until you have a crumbly texture. This topping will bake up golden brown and crispy—just what you want for that satisfying crunch!
Step 4: Assemble and Bake
Sprinkle your crumbly topping over the apple mixture evenly. Bake in your preheated oven for about 45-60 minutes until the fruit is soft and bubbling beneath that beautiful topping. Let it cool slightly before serving; this will help set everything perfectly.
Now gather everyone around as you serve warm slices of The Best Apple Crisp topped with creamy vanilla ice cream! Enjoy every bite—you deserve this deliciousness!
Pro Tips for Making The Best Apple Crisp
Creating the perfect apple crisp is easier than you might think! With a few simple tips, you’ll be well on your way to impressing friends and family with this delightful dessert.
-
Choose the right apples: Use a mix of sweet and tart apples, like Granny Smith and Honeycrisp. This combo brings out the best flavors and ensures a balanced sweetness in your crisp.
-
Don’t skimp on seasoning: A little extra cinnamon can enhance the overall flavor profile. It’s not just about sweetness; spices add warmth that makes this dish so comforting.
-
Let it cool before serving: Allowing your apple crisp to cool slightly before serving helps the juices settle. This way, it won’t be too runny when you scoop it out!
-
Experiment with toppings: Feel free to add chopped nuts or even shredded coconut into the topping mix for added texture and flavor. It makes your crisp uniquely yours!
-
Make ahead: You can prepare the filling and topping separately ahead of time and store them in the fridge. Just assemble and bake when you’re ready for dessert!
How to Serve The Best Apple Crisp
Serving your homemade apple crisp is all about presentation and enhancing the experience. Here are some ideas to make this dessert truly special!
Garnishes
- Whipped cream: A dollop of whipped cream on top adds a creamy contrast to the warm apple filling.
- Caramel drizzle: A light drizzle of caramel sauce brings an extra layer of sweetness that pairs beautifully with the cinnamon.
- Chopped nuts: Sprinkle some toasted pecans or walnuts for a delightful crunch that complements the softness of the apples.
Side Dishes
- Vanilla ice cream: The classic pairing! The cold creaminess of vanilla ice cream balances perfectly with the warm, spiced apples.
- Greek yogurt: For a healthier option, serve with a scoop of Greek yogurt mixed with honey. It adds creaminess without being overly sweet.
- Fresh fruit salad: A light fruit salad can provide a refreshing contrast to the richness of the apple crisp. Think seasonal fruits like berries or citrus!
- Coffee or tea: A warm cup of coffee or herbal tea can enhance your dessert experience, making it cozy and inviting—perfect for those fall evenings!
With these tips and serving suggestions, you’ll be ready to make The Best Apple Crisp a standout feature at any gathering. Happy baking!
Make Ahead and Storage
This Apple Crisp recipe is perfect for meal prep! You can easily make it ahead of time and store it, so you’re ready to enjoy this delicious dessert at a moment’s notice.
Storing Leftovers
- Allow the Apple Crisp to cool completely before storing.
- Cover the dish with plastic wrap or transfer leftovers to an airtight container.
- Store in the refrigerator for up to 3-4 days.
Freezing
- Let the Apple Crisp cool completely.
- Wrap the dish tightly with plastic wrap, then aluminum foil to prevent freezer burn.
- Freeze for up to 3 months. For best results, freeze before baking.
Reheating
- If frozen, thaw the Apple Crisp in the refrigerator overnight.
- Preheat your oven to 350°F (175°C).
- Cover with foil and bake for about 20 minutes until warmed through. Remove the foil for the last 5 minutes to crisp up the topping.
FAQs
Here are some common questions you might have about making The Best Apple Crisp.
Can I use other fruits in The Best Apple Crisp?
Absolutely! While apples are traditional, you can mix in berries, pears, or peaches for a delightful twist. Just adjust sugar levels based on sweetness.
How do I know when The Best Apple Crisp is done baking?
The crisp is done when the apples are soft and bubbly, and the topping is golden brown. A fork should easily pierce through the fruit!
Can I make The Best Apple Crisp gluten-free?
Yes! Substitute all-purpose flour with a gluten-free blend or almond flour for a tasty gluten-free version while maintaining that delicious texture!
What type of apples work best for The Best Apple Crisp?
For optimal flavor and texture, choose a mix of sweet and tart apples like Granny Smith, Honeycrisp, or Fuji. This balance enhances the overall taste!
Final Thoughts
I hope you enjoy making The Best Apple Crisp as much as I do! This warm and comforting dessert is not only easy to prepare but also brings joy to any gathering. Whether it’s a family dinner or a cozy night in, this apple crisp is sure to delight everyone around your table. Don’t hesitate to make it your own by adding your favorite fruits or spices—enjoy every bite!
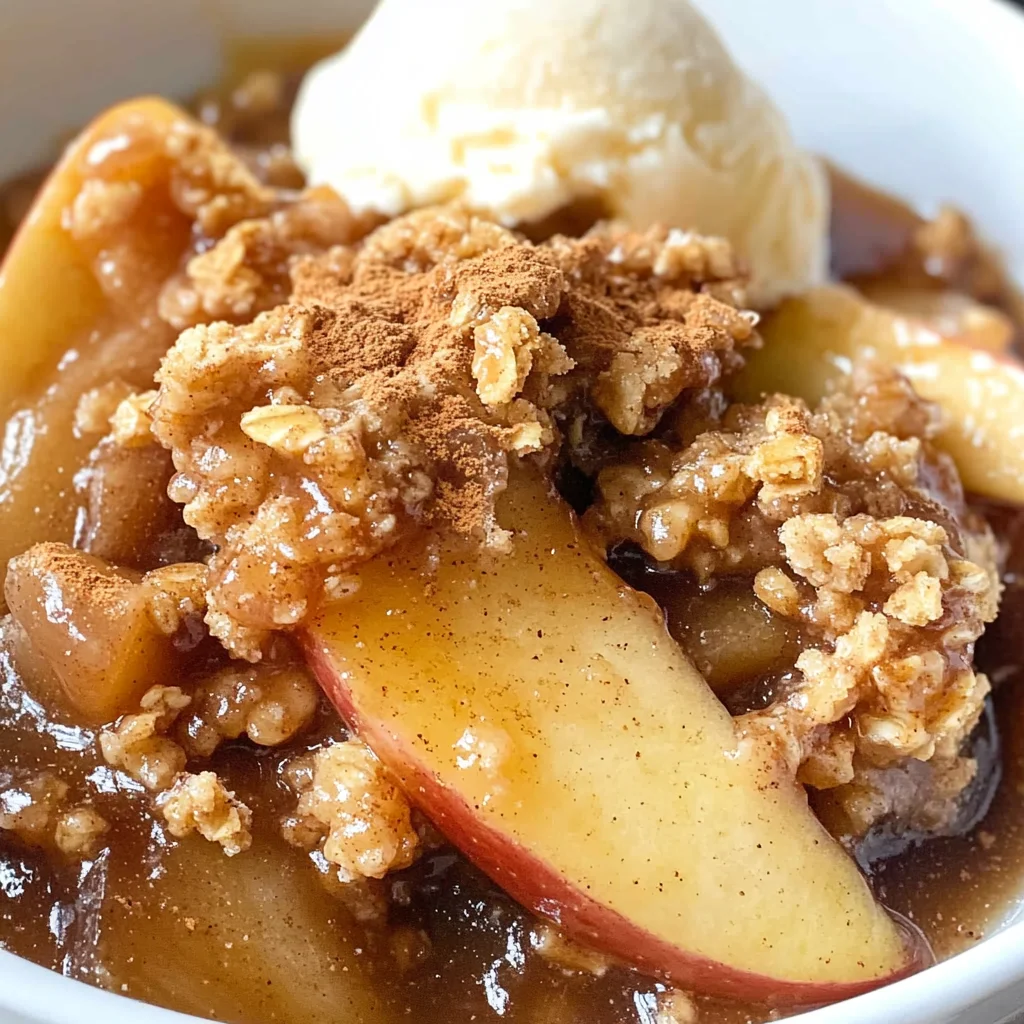
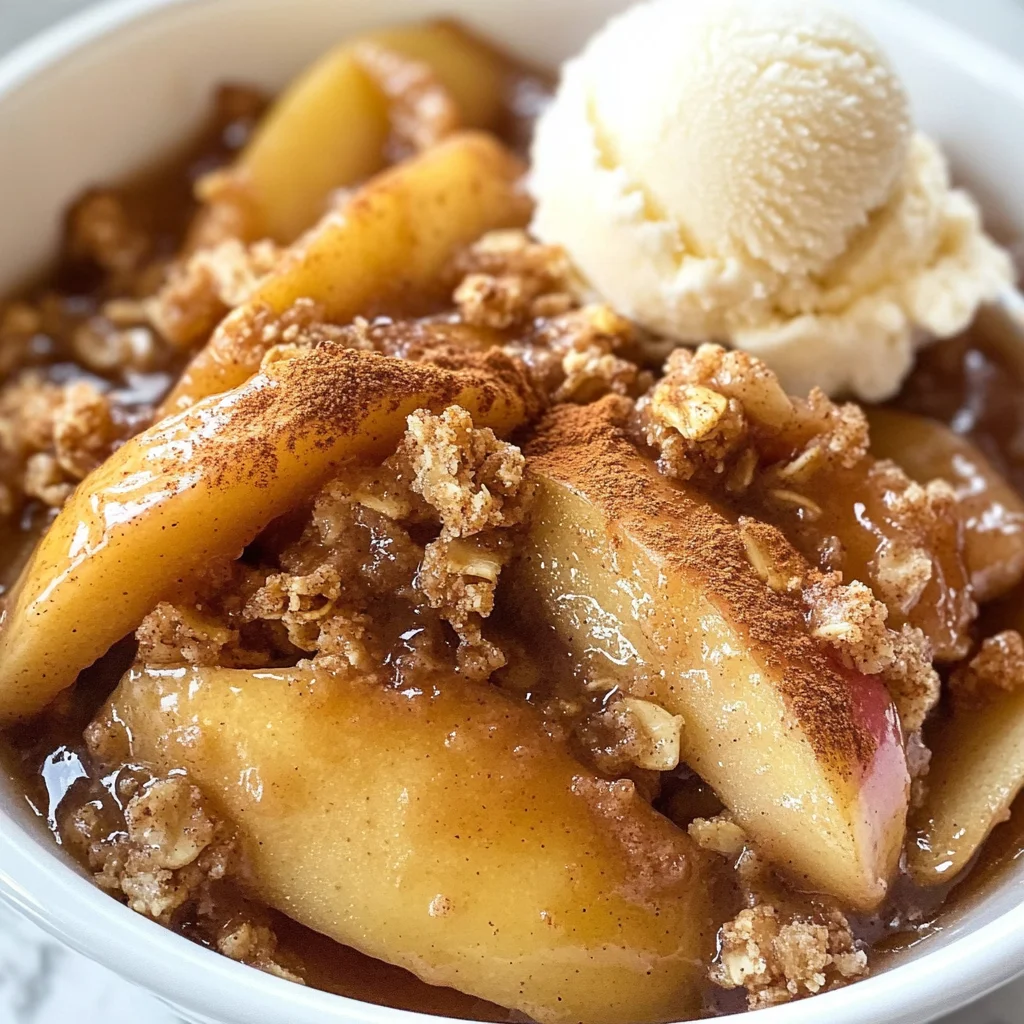
The Best Apple Crisp

Indulge in the warmth and comfort of The Best Apple Crisp, a delightful dessert that transforms fresh apples into a heartwarming treat. This cozy dish is perfect for any occasion, from casual weeknight dinners to festive gatherings. With its crunchy oat topping and sweet cinnamon-spiced apple filling, each bite offers a taste of autumn that evokes cherished memories of family and laughter. Best of all, it’s incredibly easy to prepare with simple ingredients you likely have on hand. Serve warm with a scoop of vanilla ice cream or a dollop of creamy yogurt for an unforgettable experience.
- Prep Time: 15 minutes
- Cook Time: 50 minutes
- Total Time: 1 hour 5 minutes
- Yield: Serves approximately 6
- Category: Dessert
- Method: Baking
- Cuisine: American
Ingredients
- 5 cups fresh apples, sliced
- 1/2 cup granulated sugar
- 1 teaspoon vanilla extract
- 1/2 cup all-purpose flour
- 1/3 cup old-fashioned oats
- 2/3 cup packed brown sugar
- 1/4 cup butter, melted
- 1/2 teaspoon cinnamon
- 1/4 teaspoon salt
Instructions
- Preheat your oven to 350°F (175°C).
- In a bowl, mix sliced apples with granulated sugar, vanilla extract, and cinnamon. Pour into a greased baking dish.
- In another bowl, combine flour, oats, brown sugar, salt, and more cinnamon. Stir in melted butter until crumbly.
- Spread the topping evenly over the apple mixture.
- Bake for 45-60 minutes until apples are bubbly and topping is golden brown. Let cool slightly before serving.
Nutrition
- Serving Size: 1 serving
- Calories: 220
- Sugar: 20g
- Sodium: 80mg
- Fat: 9g
- Saturated Fat: 5g
- Unsaturated Fat: 4g
- Trans Fat: 0g
- Carbohydrates: 35g
- Fiber: 3g
- Protein: 2g
- Cholesterol: 15mg