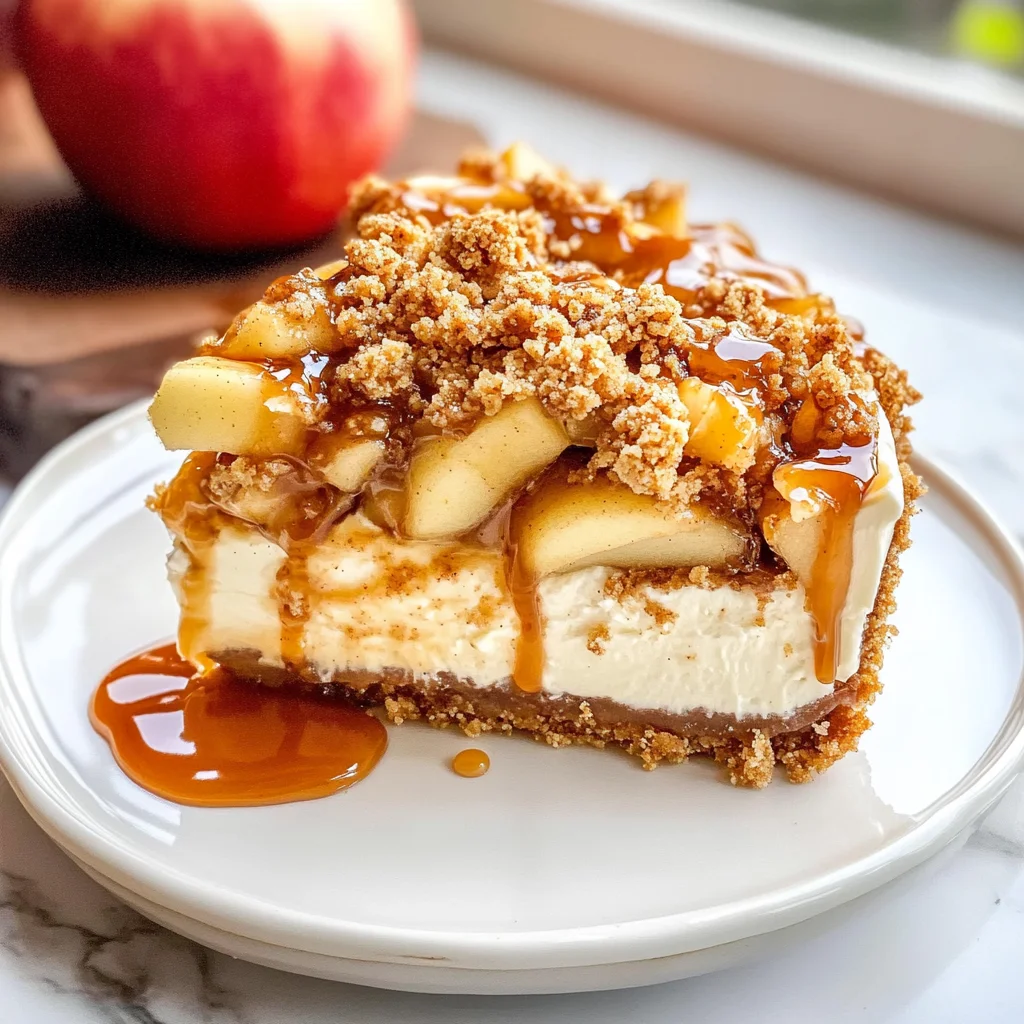
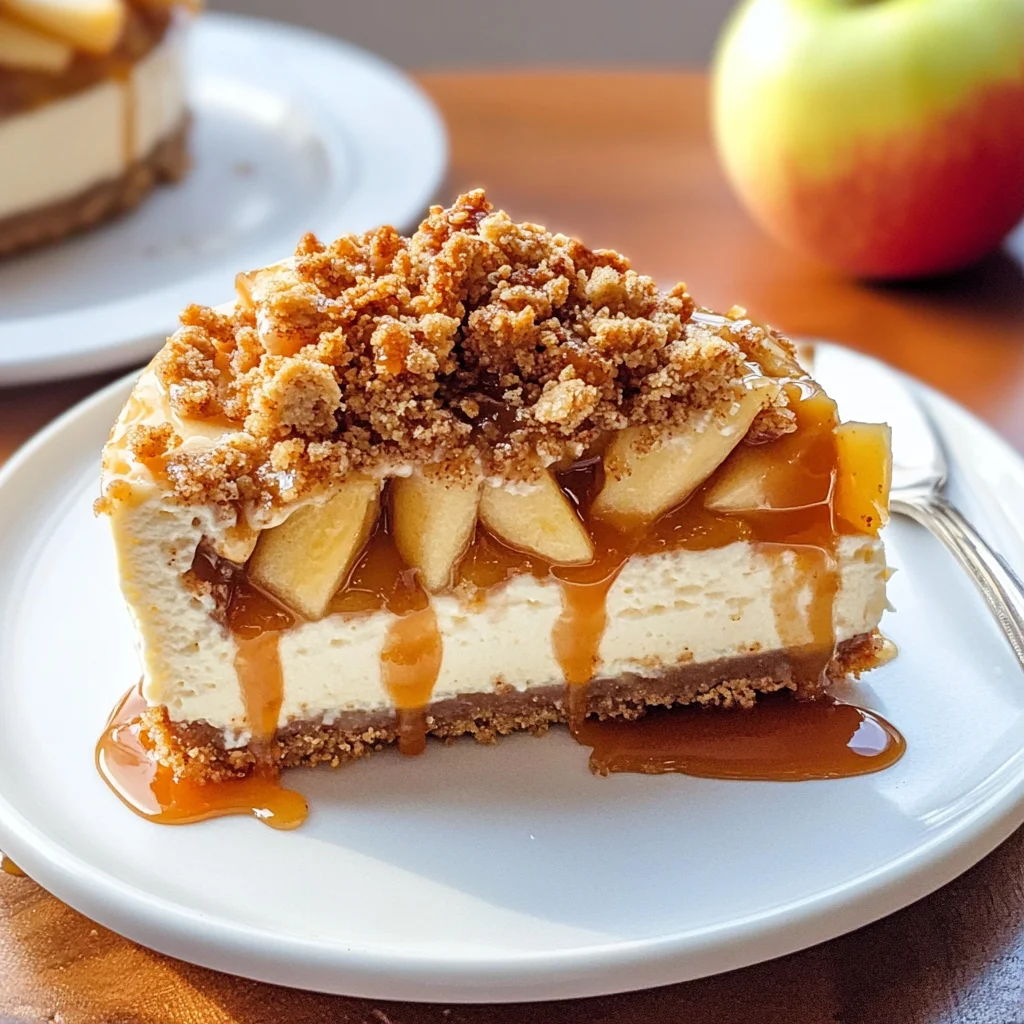
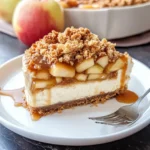
Apple Crisp Cheesecake
If you’re looking for a dessert that combines the comforting flavors of fall with the rich creaminess of cheesecake, then you’re going to love this Apple Crisp Cheesecake. This delightful treat layers a sweet graham cracker crust with tangy vanilla cheesecake, topped with perfectly spiced cinnamon apples and a crunchy oatmeal crumble. It’s truly a showstopper that’s perfect for family gatherings, cozy weekends, or just when you want to treat yourself!
This recipe is extra special to me because it reminds me of warm autumn evenings spent with friends and family. The moment you cut into this cheesecake and see those layers, it’s hard not to smile. And trust me, the combination of creamy cheesecake and spiced apples is a flavor experience you won’t forget!
Why You’ll Love This Recipe
- Easy Preparation: With straightforward steps, you’ll be enjoying this delicious dessert in no time!
- Family-Friendly Delight: Everyone will love the taste of apple crisp combined with creamy cheesecake – it’s sure to be a hit!
- Make-Ahead Convenience: You can prepare this cheesecake in advance, making it perfect for busy days or special occasions.
- Decadent Flavor: The blend of apple cinnamon goodness and creamy richness creates an unforgettable flavor explosion.
- Showstopper Presentation: With its beautiful layers and topping, this dessert looks as good as it tastes!
Ingredients You’ll Need
Let’s gather our simple and wholesome ingredients for this Apple Crisp Cheesecake! You’ll find everything you need right at your local grocery store, so let’s get started.
For the Crust
- 3 cups graham crumbs
- 3 tablespoons brown sugar
- 1/2 teaspoon cinnamon
- 1/2 cup unsalted butter (112 grams) (melted)
For the Apple Filling
- 2 large apples (I recommend Granny Smith or Gala)
- 2 tablespoons brown sugar
- 1 1/2 teaspoons cinnamon
For the Oatmeal Crumble
- 1/2 cup all-purpose flour (63 grams)
- 1/2 cup brown sugar (100 grams)
- 1 teaspoon cinnamon
- 1/2 cup quick oats
- 1/4 cup unsalted butter (56 grams) (melted)
For the Cheesecake Filling
- 24 ounces full-fat cream cheese (680 grams) (room temperature)
- 3/4 cup granulated sugar (150 grams)
- 1/4 cup brown sugar (50 grams)
- 1/2 teaspoon cinnamon
- 1 tablespoon cornstarch (or 2 tablespoons all-purpose flour)
- 1 teaspoon vanilla extract
- 1/2 cup sour cream (120 ml) (room temperature)
- 3 large eggs (room temperature)
Other Essentials
- Boiling water (for the water bath)
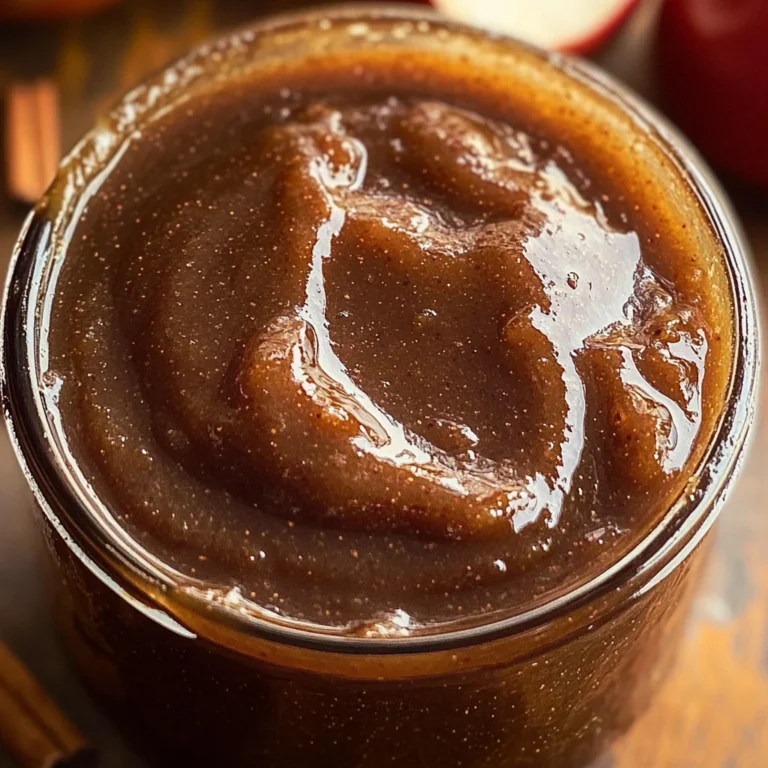
- Salted caramel sauce
Variations
This Apple Crisp Cheesecake is wonderfully flexible! Here are a few ideas to make it your own:
- Change Up the Fruit: Swap apples for pears or berries for a different fruity twist.
- Add Nuts: Mix in some chopped nuts into the crumble for added texture and flavor.
- Try Different Spices: Experiment with nutmeg or allspice alongside the cinnamon for a unique taste.
- Make It Gluten-Free: Use gluten-free graham crackers and flour substitutes to cater to dietary needs.
How to Make Apple Crisp Cheesecake
Step 1: Preheat Your Oven
Start by preheating your oven to 350°F (180°C or 160°C in a fan-forced oven). This ensures that your cheesecake bakes evenly from the start.
Step 2: Prepare the Springform Pan
Wrap the outside of a 9-inch springform pan in tin foil. Make sure to cover both the bottom and sides securely—this helps prevent water from leaking in during baking. Lightly grease it with non-stick cooking spray for easy removal later.
Step 3: Make the Crust
In a bowl, mix together graham crumbs, brown sugar, cinnamon, and melted butter until well combined. Press this mixture firmly into the bottom of your prepared springform pan. A solid crust is key because it holds everything together beautifully!
Step 4: Prepare the Apples
Peel and slice your apples thinly. Toss them with brown sugar and cinnamon in a bowl until they are well coated. This will enhance their natural sweetness while baking.
Step 5: Create the Oatmeal Crumble
In another bowl, combine flour, brown sugar, cinnamon, quick oats, and melted butter until crumbly. This topping adds that delicious crunch we love about apple crisp!
Step 6: Make the Cheesecake Filling
In a large mixing bowl, beat room temperature cream cheese until smooth. Gradually add granulated sugar and brown sugar while mixing well. Incorporate cinnamon, cornstarch, vanilla extract, sour cream, and eggs one at a time until everything is perfectly blended.
Step 7: Assemble Your Cheesecake
Pour half of your cheesecake filling over the crust in your springform pan. Layer half of your spiced apples on top followed by half of your crumble. Repeat these layers until all components are used up.
Step 8: Bake Using Water Bath
Place your assembled cheesecake in a larger baking dish filled with boiling water halfway up the sides of your springform pan. This water bath helps create steam which keeps your cheesecake moist while baking. Bake it for about 55 minutes or until set but slightly jiggly in the center.
Step 9: Cool Down & Serve
Once baked, turn off the oven and crack open its door slightly; let your cheesecake cool slowly inside for about an hour before transferring it to the fridge. Chill for several hours or overnight before serving. Drizzle with salted caramel sauce right before slicing for an extra touch of sweetness!
Enjoy every creamy bite of this lovely Apple Crisp Cheesecake!
Pro Tips for Making Apple Crisp Cheesecake
Making the perfect apple crisp cheesecake is all about attention to detail and a little love. Here are some pro tips to ensure your dessert turns out wonderfully every time:
-
Use room temperature ingredients: Bringing your cream cheese, eggs, and sour cream to room temperature helps them blend more smoothly, resulting in a creamier cheesecake without lumps.
-
Don’t rush the baking process: Slow and steady wins the race! Baking your cheesecake in a water bath keeps it moist and prevents cracks from forming on the top, which can happen with rapid cooking.
-
Cool gradually: After baking, let your cheesecake cool in the oven with the door ajar. This gradual cooling helps prevent sudden temperature changes that can cause cracks.
-
Let it chill: Allowing your cheesecake to chill overnight not only enhances the flavors but also helps it set properly. The longer it sits, the better it tastes!
-
Be generous with toppings: A drizzle of salted caramel sauce adds an irresistible touch! It complements the creamy cheesecake and cinnamon apples beautifully.
How to Serve Apple Crisp Cheesecake
Presenting your apple crisp cheesecake can elevate its appeal and make for an inviting dessert display. Here are some ideas on how to serve this delightful treat:
Garnishes
- Whipped Cream: A dollop of homemade whipped cream adds a light and airy texture, balancing the richness of the cheesecake.
- Cinnamon Dusting: A light sprinkle of cinnamon on top enhances the warm flavors of the apples and gives a rustic look.
- Chopped Nuts: Toasted pecans or walnuts add a crunchy texture that contrasts nicely with the creamy filling.
Side Dishes
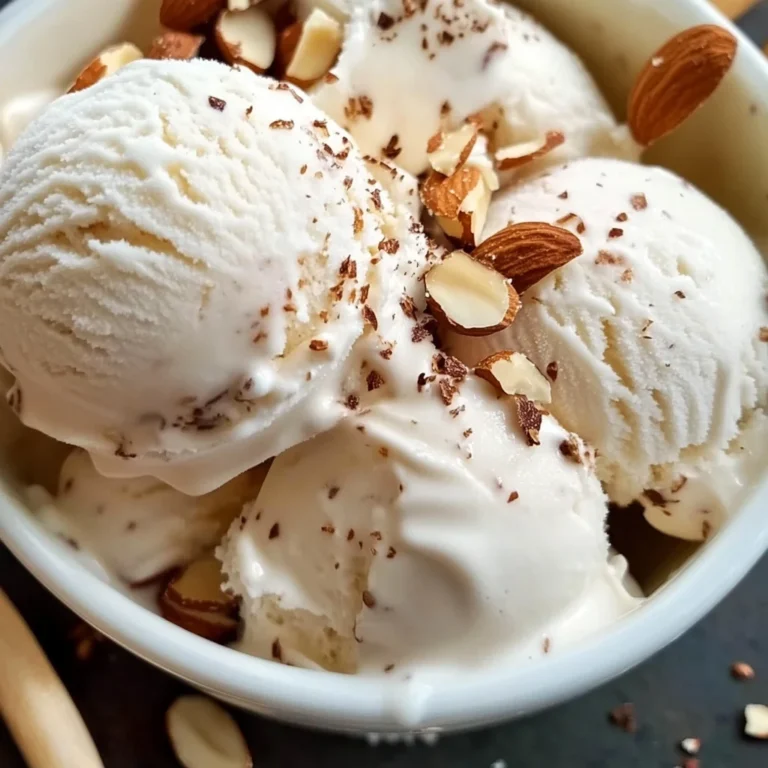
- Vanilla Ice Cream: A scoop of vanilla ice cream serves as a classic pairing, providing a creamy complement to the warm flavors of apple crisp cheesecake.
- Caramel Sauce: Serving additional salted caramel sauce on the side allows guests to customize their dessert experience.
- Fresh Berries: A side of fresh raspberries or strawberries adds a burst of freshness that cuts through the richness of the cheesecake.
- Coffee or Tea: Offering a warm beverage like coffee or tea enhances the cozy vibe of this dessert, making it perfect for gatherings.
Now that you have all these tips and serving suggestions, you’re ready to impress family and friends with your delicious apple crisp cheesecake! Enjoy every moment of baking—and every bite of this delectable dessert!
Make Ahead and Storage
This Apple Crisp Cheesecake is a fantastic recipe for meal prep! You can easily make it ahead of time, ensuring you have this delightful dessert ready for gatherings or cozy nights at home.
Storing Leftovers
- Allow the cheesecake to cool completely before storing.
- Cover the cheesecake with plastic wrap or aluminum foil.
- Store in the refrigerator for up to 5 days.
Freezing
- Once cooled, slice the cheesecake into individual pieces.
- Wrap each slice tightly in plastic wrap and then in aluminum foil to prevent freezer burn.
- Freeze for up to 3 months. Thaw in the refrigerator overnight before serving.
Reheating
- If you prefer warm cheesecake, preheat your oven to 300F (150C).
- Place the cheesecake slice on a baking sheet and cover loosely with aluminum foil.
- Heat for about 10-15 minutes or until warmed through.
FAQs
Here are some common questions about making Apple Crisp Cheesecake!
Can I make Apple Crisp Cheesecake without a springform pan?
Yes! You can use any round cake pan; just ensure it’s greased well and allow for extra cooling time before removing from the pan.
How do I know when my Apple Crisp Cheesecake is done?
The edges should be set while the center appears slightly jiggly. It will firm up as it cools.
What can I substitute for sour cream in this Apple Crisp Cheesecake?
You can use plain Greek yogurt as a great alternative that maintains creaminess and tanginess.
Can I add other fruits to my Apple Crisp Cheesecake?
Absolutely! Feel free to mix in berries or pears for added flavor and texture.
How long does Apple Crisp Cheesecake last?
When stored properly in the fridge, it lasts up to 5 days. For longer storage, freeze individual slices for up to 3 months!
Final Thoughts
I hope you enjoy making this delicious Apple Crisp Cheesecake as much as I do! It’s not only a comforting dessert but also a beautiful way to celebrate apple season. The creamy layers combined with the crisp topping create an irresistible treat that will delight everyone at your table. Don’t hesitate to share your experience, and happy baking!
Apple Crisp Cheesecake
Indulge in the delightful layers of this Apple Crisp Cheesecake, where the comforting flavors of fall meet the rich creaminess of classic cheesecake. This dessert features a sweet graham cracker crust, a tangy vanilla cheesecake filling, perfectly spiced cinnamon apples, and a crunchy oatmeal crumble topping. Whether it’s for family gatherings or cozy weekends at home, this showstopper is bound to impress and satisfy your sweet tooth. The combination of creamy cheesecake and spiced apples creates an unforgettable flavor experience that will leave everyone smiling!
- Prep Time: 30 minutes
- Cook Time: 55 minutes
- Total Time: 1 hour 25 minutes
- Yield: Approximately 12 servings 1x
- Category: Dessert
- Method: Baking
- Cuisine: American
Ingredients
- 3 cups graham crumbs
- 3 tablespoons brown sugar
- 1/2 teaspoon cinnamon
- 1/2 cup unsalted butter (melted)
- 2 large apples (Granny Smith or Gala)
- 2 tablespoons brown sugar
- 1 1/2 teaspoons cinnamon
- 1/2 cup all-purpose flour
- 1/2 cup brown sugar
- 1 teaspoon cinnamon
- 1/2 cup quick oats
- 1/4 cup unsalted butter (melted)
- 24 ounces full-fat cream cheese (room temperature)
- 3/4 cup granulated sugar
- 1/4 cup brown sugar
- 1/2 teaspoon cinnamon
- 1 tablespoon cornstarch
- 1 teaspoon vanilla extract
- 1/2 cup sour cream (room temperature)
- 3 large eggs (room temperature)
- Boiling water (for the water bath)
- Salted caramel sauce
Instructions
- Preheat your oven to 350°F (180°C).
- Prepare a 9-inch springform pan by wrapping it in foil and greasing it.
- Mix graham crumbs, brown sugar, cinnamon, and melted butter for the crust; press into the pan.
- Toss sliced apples with brown sugar and cinnamon for the filling.
- Combine flour, brown sugar, oats, and melted butter for the crumble.
- Beat cream cheese until smooth; gradually add sugars, then mix in remaining cheesecake ingredients.
- Layer half of the cheesecake filling, apples, and crumble; repeat layers.
- Bake in a water bath for about 55 minutes until set but slightly jiggly.
- Cool gradually before chilling overnight.
Nutrition
- Serving Size: 1 serving
- Calories: 392
- Sugar: 25g
- Sodium: 266mg
- Fat: 28g
- Saturated Fat: 15g
- Unsaturated Fat: 11g
- Trans Fat: 0g
- Carbohydrates: 34g
- Fiber: 2g
- Protein: 6g
- Cholesterol: 95mg