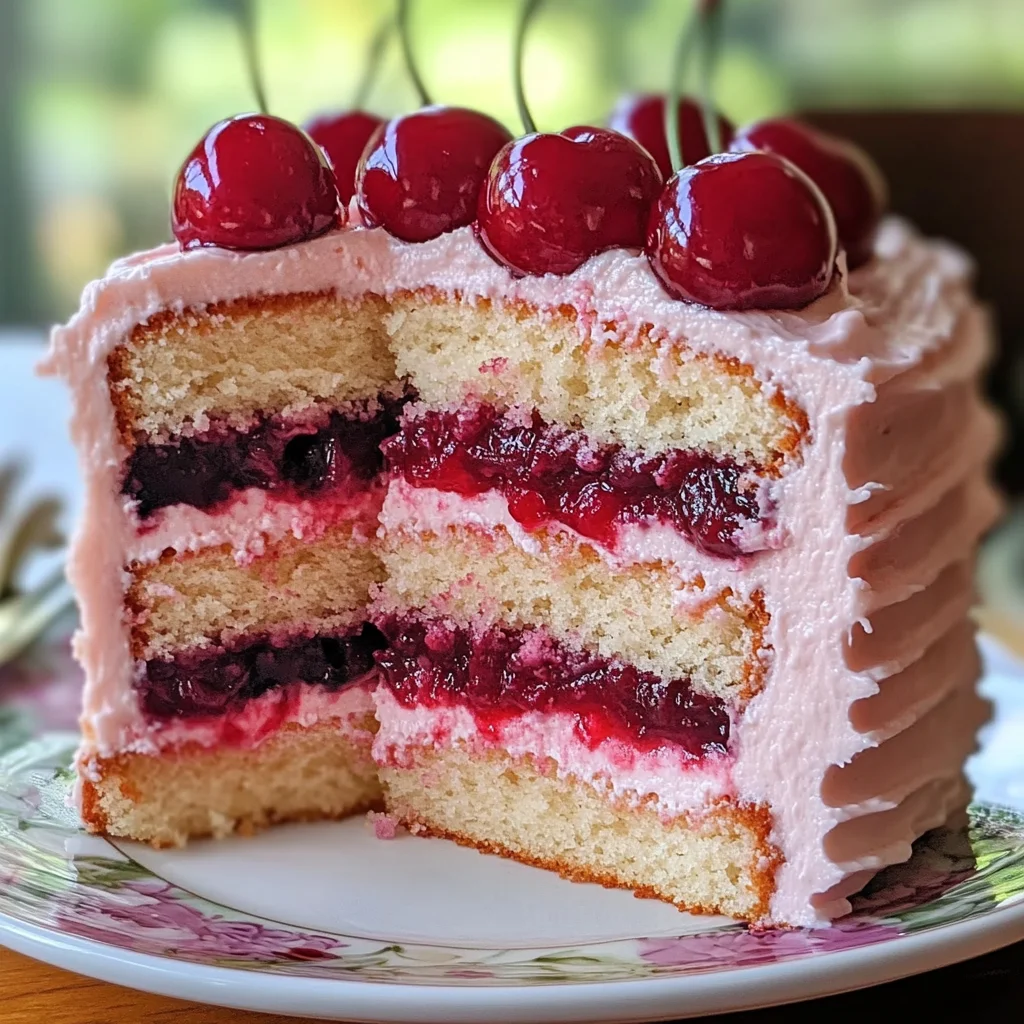
Cherry Layer Cake with Cherry Cream Cheese Frosting
If you’re looking for a dessert that truly impresses, this Cherry Layer Cake with Cherry Cream Cheese Frosting might just become your new favorite. Each bite delivers a delightful balance of sweet and tart flavors, making it perfect for any occasion—from cozy family gatherings to festive celebrations. What I love most about this recipe is how it combines simple ingredients to create something that feels special and indulgent. It’s the kind of cake that brings smiles, laughter, and sweet memories to the table.
And let’s face it, there’s something magical about a slice of layered cake adorned with creamy frosting. Whether you’re celebrating a birthday, hosting a dinner party, or simply treating yourself after a long day, this cake is sure to steal the spotlight. It’s a recipe that’s not only delicious but also fun to make!
Why You’ll Love This Recipe
- Easy to Make: This Cherry Layer Cake comes together quickly and requires no advanced baking skills, making it perfect for bakers of all levels.
- Family-Friendly: Fluffy cake layers and sweet cherry filling appeal to both kids and adults alike—everyone will be asking for seconds!
- Make Ahead: You can bake the layers in advance and assemble them later, which makes it great for busy days when you still want to serve something special.
- Deliciously Versatile: The cherry filling and frosting can be adjusted based on what you have on hand—fresh cherries in summer or frozen ones in winter work beautifully.
Ingredients You’ll Need
Let’s gather our simple and wholesome ingredients! You’ll find everything you need right here to create this delightful Cherry Layer Cake with Cherry Cream Cheese Frosting. Each ingredient plays an important role in crafting the perfect flavor and texture for your cake.
For the Cake
- 2½ cups all-purpose flour
- 2½ tsp baking powder
- ½ tsp salt
- 1 cup unsalted butter, softened
- 1¾ cups granulated sugar
- 4 large eggs, room temperature
- 2 tsp vanilla extract
- 1 cup whole milk (or buttermilk)
- 2 cups cherries (fresh, frozen, or canned), pitted and chopped
For the Frosting
- 8 oz cream cheese, softened
- ½ cup unsalted butter, softened
- 3½ cups powdered sugar
- 1 tsp vanilla extract
- ¼ cup cherry juice or puréed cherries (optional for flavor and color)
Variations
This recipe is wonderfully flexible! If you feel like getting creative or adjusting it to your taste preferences, here are some fun variations to consider:
- Change the Fruit: Substitute cherries with raspberries or strawberries for a different fruity twist.
- Add Chocolate: Incorporate cocoa powder into the batter for a chocolate-cherry layer cake that’s out of this world!
- Switch Up the Frosting: Try using whipped cream or a lighter vanilla frosting if cream cheese isn’t your favorite.
- Experiment with Nuts: Add chopped nuts like almonds or walnuts between layers for added crunch and flavor.
How to Make Cherry Layer Cake with Cherry Cream Cheese Frosting
Step 1: Preheat Your Oven
Preheat your oven to 350°F (175°C). This step ensures that your cakes bake evenly. While the oven heats up, go ahead and grease and line three 8-inch round cake pans with parchment paper. This will help prevent sticking later on.
Step 2: Mix Dry Ingredients
In a medium bowl, whisk together the flour, baking powder, and salt. Mixing these dry ingredients first helps distribute the baking powder evenly throughout the flour. It’s an essential step for achieving fluffy cake layers!
Step 3: Cream Butter and Sugar
In a large bowl, cream together the softened butter and granulated sugar until light and fluffy—this should take about 3–5 minutes. This step introduces air into your batter, creating that wonderful lightness we all love in cakes.
Step 4: Add Eggs
Now add the eggs one at a time into the creamed mixture, ensuring each egg is fully incorporated before adding the next. Don’t forget to mix in the vanilla extract too! This adds a lovely depth of flavor.
Step 5: Combine Wet and Dry Ingredients
Alternately add the flour mixture and milk to your batter—start with flour and finish with flour. This method prevents overmixing while ensuring everything is combined well. You want just enough mixing until you see no more dry flour!
Step 6: Bake the Cakes
Divide your batter evenly between the prepared pans. Bake in your preheated oven for about 22–27 minutes or until a toothpick inserted comes out clean. Keep an eye on them as oven times can vary!
Step 7: Cool Your Cakes
Once baked, cool the cakes in their pans for about 10 minutes before transferring them onto wire racks to cool completely. Cooling them properly is crucial; if they’re too warm when frosting them later on, it could melt away!
Step 8: Prepare Cherry Filling
For that luscious cherry filling, simmer chopped cherries with sugar (1–2 tbsp) over low heat until slightly thickened. Adding a splash of lemon juice brings out their natural sweetness even more! Let this cool completely before using.
Step 9: Make Your Frosting
Beat softened cream cheese until smooth in one bowl. Then add softened butter and mix until fluffy! Gradually add powdered sugar along with vanilla extract; if you’re feeling adventurous, mix in some cherry juice or purée for an extra pop of flavor!
Step 10: Assemble Your Cake
Now comes my favorite part—assembly! Start layering your cooled cakes by spreading frosting between each layer along with some cherry filling. Once stacked high enough, frost the top and sides generously with more frosting. Feel free to garnish with fresh cherries if you desire!
And there you have it—a stunning Cherry Layer Cake with Cherry Cream Cheese Frosting ready to delight everyone at your table! Enjoy every slice!
Pro Tips for Making Cherry Layer Cake with Cherry Cream Cheese Frosting
Creating a stunning Cherry Layer Cake is all about the details, and these simple tips will help ensure your cake turns out perfectly every time!
-
Use room temperature ingredients: Bringing your eggs, butter, and milk to room temperature ensures they mix together smoothly, resulting in a more even batter and fluffier cake.
-
Do not overmix the batter: Mixing just until combined helps prevent a dense cake. Overmixing can lead to gluten development, which makes the cake chewy rather than light and fluffy.
-
Let the cakes cool completely: Allowing the cakes to cool completely before frosting prevents the frosting from melting and sliding off. This also helps achieve clean layers when you cut into it.
-
Taste as you go: When making the cherry filling and frosting, taste and adjust sweetness if needed. Everyone’s palate is different, so customizing the flavors will make your cake even more enjoyable.
-
Chill the frosted cake: If you’re making your cake ahead of time or want a clean finish, chill the decorated cake in the fridge for about 30 minutes before serving. This sets the frosting nicely, making slicing easier.
How to Serve Cherry Layer Cake with Cherry Cream Cheese Frosting
Presenting your Cherry Layer Cake beautifully can make it even more enticing! Here are some ideas to elevate your dessert experience.
Garnishes
- Fresh cherries: Top each slice with a whole cherry for a pop of color and added flavor.
- Whipped cream: A dollop of whipped cream on each slice complements the richness of the frosting beautifully.
- Chocolate shavings: Sprinkle some chocolate shavings over the top for an elegant touch that adds complexity to the flavors.
Side Dishes
- Vanilla ice cream: A scoop of vanilla ice cream next to your slice offers creamy contrast and balances out the tartness of the cherries.
- Fruit salad: A refreshing fruit salad with berries complements this rich cake while adding a lightness that’s perfect for warm days.
- Coffee or tea: A warm cup of coffee or herbal tea enhances the flavors of your cherry layer cake and is perfect for afternoon gatherings.
- Cheese platter: Serve with a selection of mild cheeses—like brie or goat cheese—to create a delightful contrast between sweet and savory.
With these tips and serving suggestions, you’ll be well on your way to creating an unforgettable dessert experience that everyone will cherish! Enjoy every bite of this luscious Cherry Layer Cake with Cherry Cream Cheese Frosting!

Make Ahead and Storage
This Cherry Layer Cake with Cherry Cream Cheese Frosting is not only a delightful treat but also perfect for meal prep! You can make it ahead of time and store it properly to enjoy later, ensuring that the flavors meld beautifully.
Storing Leftovers
- Wrap individual slices in plastic wrap or aluminum foil to keep them fresh.
- Store the wrapped cake in an airtight container or a resealable bag.
- Refrigerate for up to 5 days.
Freezing
- Wrap the entire cooled cake tightly in plastic wrap.
- Place the wrapped cake in a freezer-safe container or bag.
- Freeze for up to 3 months. For best results, freeze without frosting.
Reheating
- Thaw frozen cake overnight in the refrigerator before serving.
- For a warm slice, microwave on low power for 10-15 seconds.
- Avoid overheating to maintain the texture of the cake.
FAQs
Here are some common questions about this delicious recipe:
Can I make Cherry Layer Cake with Cherry Cream Cheese Frosting gluten-free?
Yes! You can substitute all-purpose flour with a gluten-free baking blend. Be sure to check that all other ingredients are gluten-free as well.
How should I store Cherry Layer Cake with Cherry Cream Cheese Frosting?
Store leftovers wrapped tightly in the fridge for up to 5 days. For longer storage, consider freezing it!
Can I use different fruits instead of cherries?
Absolutely! This recipe works well with other fruits like raspberries or blueberries. Just adjust the sweetness based on the fruit you choose.
How long does it take to make Cherry Layer Cake with Cherry Cream Cheese Frosting?
The total time for this recipe is around 50 minutes, which includes both preparation and baking times.
What can I serve with Cherry Layer Cake?
This cake pairs wonderfully with whipped cream or vanilla ice cream, adding an extra layer of indulgence!
Final Thoughts
I hope you feel inspired to whip up this stunning Cherry Layer Cake with Cherry Cream Cheese Frosting! It’s not just a dessert; it’s a piece of art that brings joy to any occasion. Whether it’s a birthday celebration, a family gathering, or simply satisfying your sweet tooth, this cake is sure to impress. Enjoy every bite and happy baking!
Cherry Layer Cake with Cherry Cream Cheese Frosting
Indulge in the delightful layers of our Cherry Layer Cake with Cherry Cream Cheese Frosting. This stunning dessert combines fluffy cake layers with a luscious cherry filling and creamy frosting, offering the perfect balance of sweet and tart flavors. Ideal for any celebration or just to treat yourself after a long day, this cake is sure to impress family and friends alike. With simple ingredients and easy-to-follow instructions, even beginner bakers can create this showstopper that brings joy to every occasion.
- Prep Time: 20 minutes
- Cook Time: 25 minutes
- Total Time: 45 minutes
- Yield: Approximately 16 servings 1x
- Category: Dessert
- Method: Baking
- Cuisine: American
Ingredients
- 2½ cups all-purpose flour
- 2½ tsp baking powder
- ½ tsp salt
- 1 cup unsalted butter, softened
- 1¾ cups granulated sugar
- 4 large eggs, room temperature
- 2 tsp vanilla extract
- 1 cup whole milk
- 2 cups cherries (fresh, frozen, or canned), pitted and chopped
- 8 oz cream cheese, softened
- ½ cup unsalted butter, softened
- 3½ cups powdered sugar
- ¼ cup cherry juice or puréed cherries (optional for flavor and color)
Instructions
- Preheat your oven to 350°F (175°C). Grease and line three 8-inch round cake pans.
- In a medium bowl, whisk together the flour, baking powder, and salt.
- In a large bowl, cream together the softened butter and granulated sugar until light and fluffy.
- Add the eggs one at a time into the creamed mixture, thoroughly mixing in each before adding the next. Also, mix in the vanilla extract.
- Gradually add the flour mixture alternately with the milk, starting and finishing with flour, mixing just until combined.
- Fold in the pitted cherries.
- Divide the batter evenly amongst the prepared pans and bake for about 22–27 minutes or until a toothpick inserted comes out clean. Allow to cool completely.
- For the frosting, beat the softened cream cheese until smooth. Then mix in the softened butter until fluffy. Gradually add the powdered sugar and mix in the vanilla extract; add cherry juice for flavor if desired.
- Assemble the cake by layering cakes with frosting and cherry filling in between, then frost the top and sides.
Nutrition
- Serving Size: 1 slice (85g)
- Calories: 365
- Sugar: 40g
- Sodium: 210mg
- Fat: 16g
- Saturated Fat: 10g
- Unsaturated Fat: 5g
- Trans Fat: 0g
- Carbohydrates: 54g
- Fiber: 1g
- Protein: 4g
- Cholesterol: 60mg