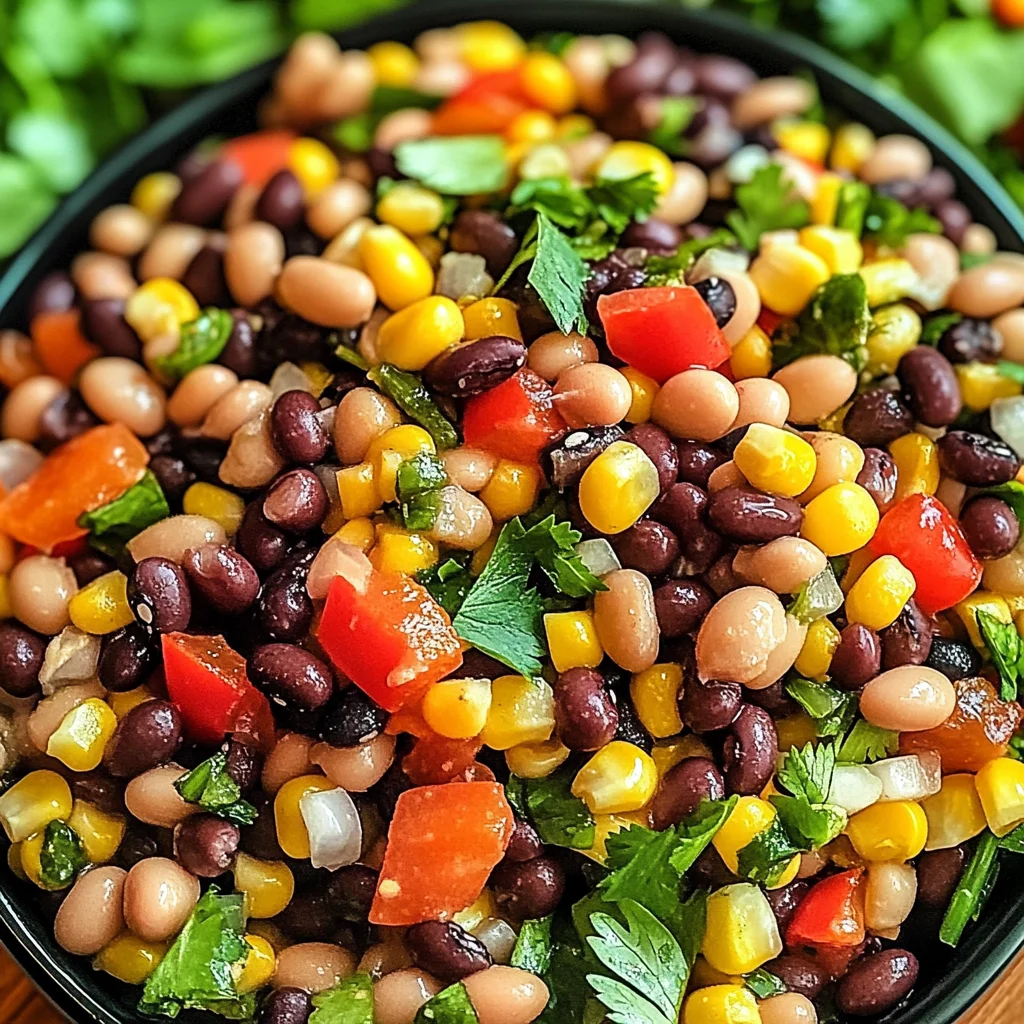
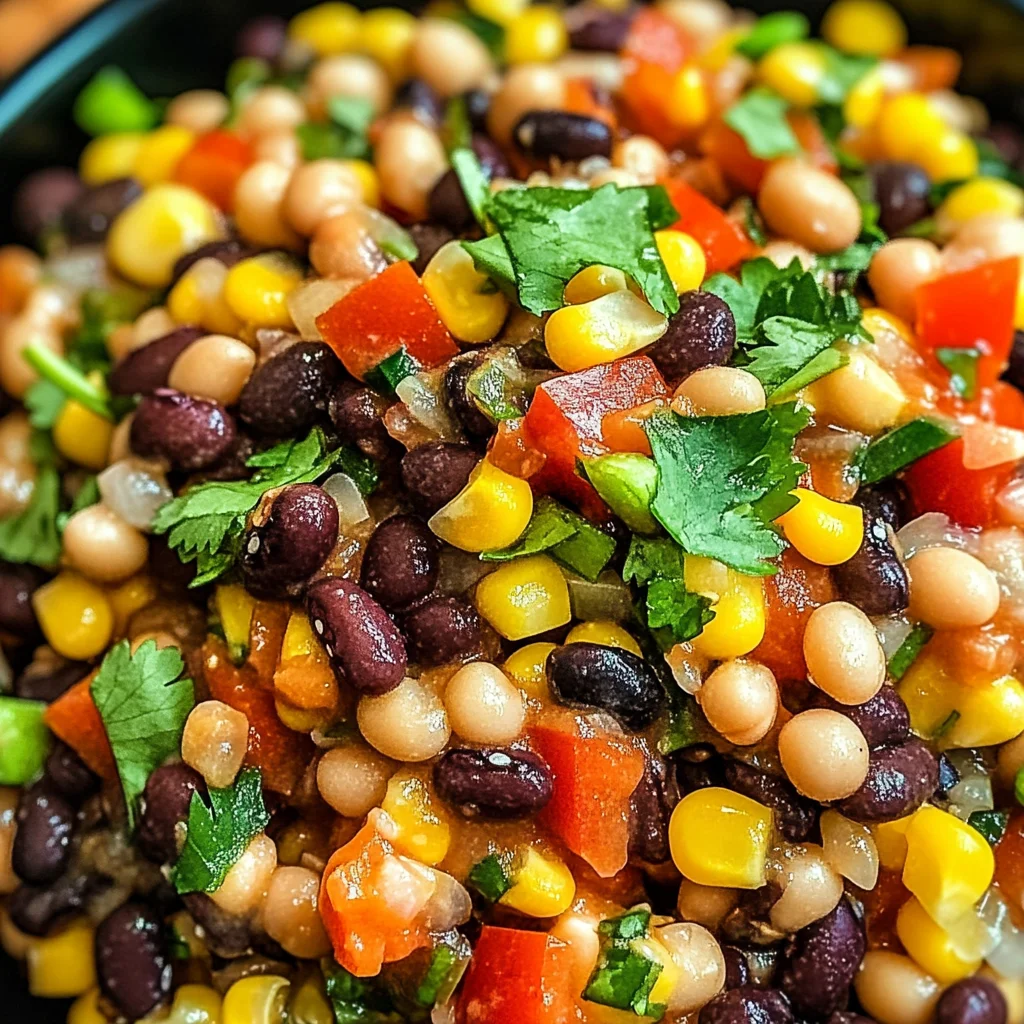
Cowboy Caviar
If you’re looking for a delicious and colorful dip that brings joy to any gathering, then this Cowboy Caviar is just what you need! This vibrant dish is packed with beans, corn, and fresh veggies, making it not only a feast for the eyes but also a nutritious option. I love serving this at family gatherings or when friends come over for a game night. It’s so easy to whip up and always disappears fast!
Whether you enjoy it with tortilla chips or as a topping on your favorite tacos, this Cowboy Caviar is sure to be a hit. Plus, it’s perfect for busy weeknights when you want something quick yet satisfying.
Why You’ll Love This Recipe
- Quick to prepare: With just 10 minutes of prep time, you can have this delightful dip ready in no time!
- Nutritious ingredients: Packed with beans and fresh veggies, it’s a healthy choice that doesn’t skimp on flavor.
- Perfect for sharing: This recipe serves six, making it ideal for parties or family get-togethers.
- Make-ahead friendly: Letting it chill enhances the flavors, so it’s great to prepare in advance.
- Versatile: Enjoy it as a dip, salad topping, or even as a side dish—there are so many ways to savor Cowboy Caviar!
Ingredients You’ll Need
You’ll find that the ingredients for this Cowboy Caviar are simple and wholesome. Each one plays an important role in creating those delicious flavors we all love.
For the Base
- 15.5 oz. black beans, drained and rinsed
- 15.5 oz. black-eyed peas, drained and rinsed
- 15 oz. sweet corn, drained
For the Veggies
- 1 cup fresh cilantro, chopped
- ½ cup red bell pepper, diced
- ½ cup orange bell pepper, diced
- ½ cup red onion, diced
For the Dressing
- 1 tsp. chili powder
- ½ tsp. kosher salt
- ¼ cup granulated sugar
- ½ cup olive oil
- ⅓ cup white apple vinegar
- 1 tbsp. fresh lime juice
- ¼ tsp. garlic powder
Variations
One of the best things about Cowboy Caviar is how flexible it is! Feel free to play around with different ingredients based on what you have on hand or your personal preferences.
- Add some heat: If you enjoy spice, toss in some diced jalapeños or a pinch of cayenne pepper for an extra kick.
- Go green: Mix in some chopped avocado for creaminess or add in diced cucumber for extra crunch.
- Change up the beans: Use kidney beans or chickpeas instead of black-eyed peas for a new twist.
- Herb swap: Try using parsley or green onions instead of cilantro if you’re not a fan.
How to Make Cowboy Caviar
Step 1: Prepare the Beans and Corn
Start by preparing your black beans, black-eyed peas, and sweet corn. Drain and rinse them well—this step removes excess sodium and keeps your dip nice and fresh! Pat them dry with a paper towel so they don’t water down the final dish.
Step 2: Mix the Veggies
In a large mixing bowl, combine your prepared beans and corn with the chopped cilantro, red bell pepper, orange bell pepper, and red onion. Stir gently but thoroughly; this ensures every bite is packed with flavor and color!
Step 3: Whisk Together the Dressing
In a separate bowl, whisk together chili powder, kosher salt, granulated sugar, olive oil, white apple vinegar, fresh lime juice, and garlic powder until smooth. This dressing adds depth to the Cowboy Caviar—each ingredient complements the others beautifully.
Step 4: Combine Everything
Pour your dressing over the bean mixture and stir gently until everything is evenly coated. This step is essential because it marries all those wonderful flavors together!
Step 5: Chill Out!
Refrigerate your Cowboy Caviar for at least 30 minutes before serving. Letting it chill allows all those tastes to mingle perfectly—the wait will be worth it!
And there you have it—a delightful Cowboy Caviar that’s ready to impress at any occasion! Enjoy every delicious bite!
Pro Tips for Making Cowboy Caviar
Making Cowboy Caviar is a breeze, but a few tips can take your dish from good to unforgettable!
-
Use Fresh Ingredients: Fresh vegetables and herbs not only enhance the flavor but also add vibrant colors, making your dish visually appealing.
-
Chill Before Serving: Allowing the Cowboy Caviar to chill in the refrigerator for at least 30 minutes helps meld the flavors together, resulting in a more delicious dip.
-
Adjust Seasoning to Taste: Feel free to tweak the amount of salt, chili powder, or lime juice based on your personal preferences. This way, you can make it just right for your palate!
-
Experiment with Add-Ins: Consider adding diced avocados or jalapeños for extra creaminess or heat. These ingredients can elevate the texture and flavor profile.
-
Use High-Quality Olive Oil: A good quality olive oil brings richness and depth to the dressing, enhancing the overall taste of the Cowboy Caviar.
How to Serve Cowboy Caviar
Cowboy Caviar is as versatile as it is delicious! Whether you’re hosting a party or enjoying a casual night in, this dip can shine in various presentations.
Garnishes
- Chopped Avocado: Adds creaminess that complements the crunchy veggies perfectly.
- Feta Cheese Crumbles: A sprinkle can introduce a tangy flavor that balances well with the sweetness of corn.
- Fresh Lime Wedges: Serving lime wedges alongside allows guests to squeeze fresh juice over their portion, adding a burst of freshness.
Side Dishes
-
Tortilla Chips: The classic pairing! Crispy tortilla chips provide a satisfying crunch that pairs beautifully with the creamy textures of Cowboy Caviar.
-
Grilled Veggies: Seasonal grilled vegetables such as zucchini and bell peppers add an earthy element that complements the dip’s brightness.
-
Stuffed Mini Peppers: These bite-sized delights filled with cheese or quinoa are perfect for scooping up Cowboy Caviar while adding an extra layer of flavor.
-
Cornbread Muffins: Soft and slightly sweet cornbread muffins make for a comforting side that rounds out your Southwestern-themed meal.
With these serving suggestions and pro tips, your Cowboy Caviar will surely be a hit at any gathering! Enjoy every colorful bite!
Make Ahead and Storage
This Cowboy Caviar is perfect for meal prep! With its vibrant ingredients and bold flavors, it can be made ahead of time, allowing the flavors to meld beautifully. Here’s how you can store it for later enjoyment.
Storing Leftovers
- Store any leftovers in an airtight container in the refrigerator.
- It will keep well for up to 3 days.
- If the mixture becomes too watery, simply drain a bit of the liquid before serving.
Freezing
- Cowboy Caviar is best enjoyed fresh, but you can freeze it if needed.
- Place it in a freezer-safe container or bag, ensuring to remove excess air.
- It can be frozen for up to 2 months. Thaw in the refrigerator overnight before serving.
Reheating
- This recipe is typically enjoyed cold, so no reheating is necessary.
- If you prefer a warm dish, gently heat it on the stove over low heat while stirring occasionally.
FAQs
Here are some frequently asked questions about this delicious Cowboy Caviar recipe!
What is Cowboy Caviar?
Cowboy Caviar is a zesty dip made with black beans, black-eyed peas, sweet corn, and fresh vegetables. It’s packed with flavor and nutrition!
Can I customize my Cowboy Caviar?
Absolutely! Feel free to add or substitute ingredients like avocado, jalapeños, or different types of beans based on your preferences.
How long does Cowboy Caviar last in the fridge?
Cowboy Caviar can be stored in the refrigerator for up to 3 days. Just make sure it’s kept in an airtight container!
Is Cowboy Caviar healthy?
Yes! This dish is loaded with protein from beans and fiber from vegetables, making it a nutritious choice for snacks or appetizers.
Final Thoughts
I hope you enjoy making this Cowboy Caviar as much as I do! It’s not just a dip; it’s a colorful celebration of flavors that brings people together. Whether you’re serving it at a party or enjoying it as a snack at home, I know you’ll find joy in every bite. Happy cooking!
Cowboy Caviar

Cowboy Caviar is a vibrant and flavorful dip that’s perfect for any gathering. This colorful dish combines black beans, black-eyed peas, sweet corn, and an assortment of fresh vegetables, creating a nutritious option that’s both satisfying and easy to prepare. With just 10 minutes of prep time, you can whip up this delightful bean salsa that pairs beautifully with tortilla chips or serves as a zesty topping for tacos. Whether it’s game night or a casual family dinner, this recipe is sure to impress your guests and will quickly become a staple in your entertaining repertoire.
- Prep Time: 10 minutes
- Cook Time: 0 minutes
- Total Time: 10 minutes
- Yield: Serves 6
- Category: Appetizer
- Method: Mixing
- Cuisine: Tex-Mex
Ingredients
- 15.5 oz. black beans, drained and rinsed
- 15.5 oz. black-eyed peas, drained and rinsed
- 15 oz. sweet corn, drained
- 1 cup fresh cilantro, chopped
- ½ cup red bell pepper, diced
- ½ cup orange bell pepper, diced
- ½ cup red onion, diced
- 1 tsp. chili powder
- ½ tsp. kosher salt
- ¼ cup granulated sugar
- ½ cup olive oil
- ⅓ cup white apple vinegar
- 1 tbsp. fresh lime juice
- ¼ tsp. garlic powder
Instructions
- Prepare the beans and corn by draining and rinsing them thoroughly to remove excess sodium.
- In a large bowl, mix the drained beans and corn with chopped cilantro, diced red bell pepper, orange bell pepper, and red onion.
- In another bowl, whisk together chili powder, kosher salt, granulated sugar, olive oil, white apple vinegar, lime juice, and garlic powder until smooth.
- Pour the dressing over the bean mixture and stir gently until well coated.
- Refrigerate for at least 30 minutes to allow flavors to meld before serving.
Nutrition
- Serving Size: 1/2 cup (120g)
- Calories: 180
- Sugar: 4g
- Sodium: 300mg
- Fat: 8g
- Saturated Fat: 1g
- Unsaturated Fat: 7g
- Trans Fat: 0g
- Carbohydrates: 24g
- Fiber: 6g
- Protein: 6g
- Cholesterol: 0mg