Halloween Cake Pops
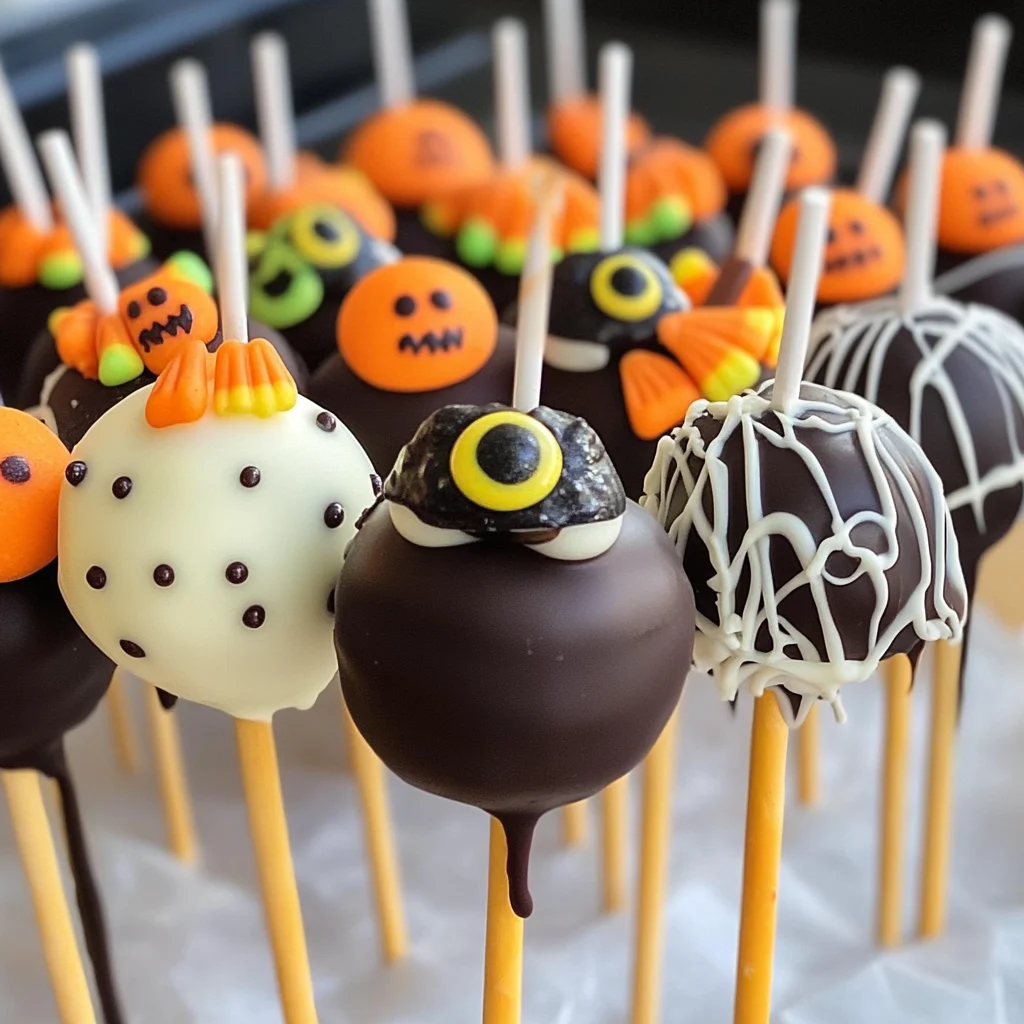
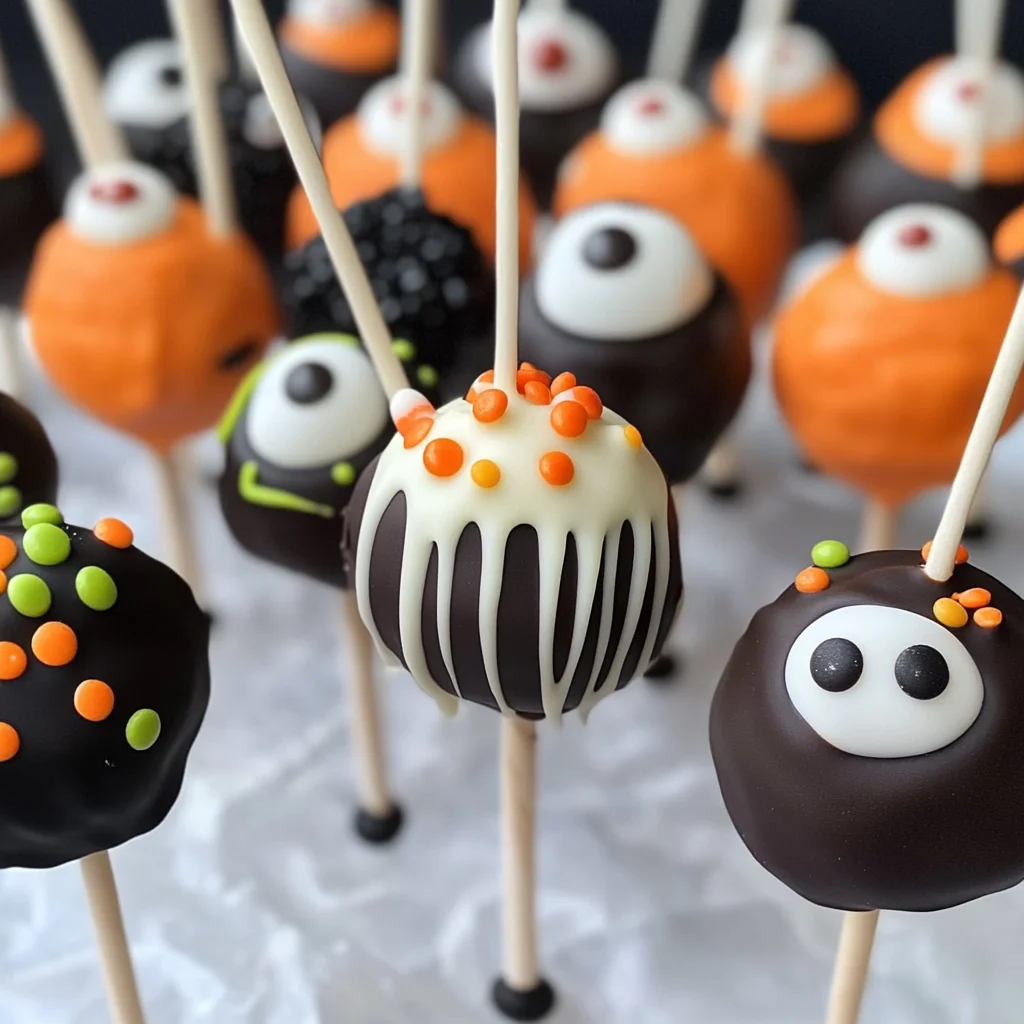
If you’re looking for a fun and festive treat to celebrate Halloween, these Halloween Cake Pops are just the thing! They’re not only adorable but also incredibly delicious, making them a hit at any gathering. I love how they combine moist chocolate cake with creamy frosting and a colorful candy coating. It’s like having a mini party on a stick! These pops are perfect for kids’ parties, family gatherings, or even just as a sweet surprise for your loved ones during this spooky season.
What makes this recipe extra special is its simplicity. You can involve the whole family in decorating these cake pops, turning it into a delightful activity that brings everyone together. Trust me, once you make these Halloween Cake Pops, they will become a cherished tradition every year!
Why You’ll Love This Recipe
- Easy to Make: With just a few simple steps, you’ll have delicious cake pops ready to enjoy.
- Family Fun: Get everyone involved in rolling and decorating; it’s a great way to bond!
- Customizable: Use any colors or decorations you like to match your Halloween theme.
- Make-Ahead Friendly: Prepare the cake pops in advance, so you can enjoy the festivities stress-free.
- Deliciously Cute: The flavors and designs are sure to impress both kids and adults alike!
Ingredients You’ll Need
Making these Halloween Cake Pops is easy with these simple and wholesome ingredients. You likely have many of them on hand already! Here’s what you’ll need:
- 15 ounce chocolate fudge cake mix (prepared in 9×13 dish)
- 1/2 cup butter
- 2 tablespoons shortening
- 1 cup powdered sugar
- 1/2 cup cocoa powder
- 1/2 teaspoon vanilla
- 2-3 tablespoons milk
- 8 ounces white candy melts
- 8 ounces orange candy melts
- 10 ounces green candy melts
- 10 ounces black candy melts
- 30 candy eyeballs
- 20 candy corn
- 10 heart sprinkles
- 40 lollipop sticks (6 inch)
- piping bags (or you can use a ziplock bag and cut the corner)
Variations
One of the great things about these Halloween Cake Pops is their flexibility! You can easily switch things up based on your preferences or what you have at home. Here are some fun ideas:
- Change the Flavor: Use vanilla or red velvet cake mix for different flavors.
- Mix Up the Coatings: Try using dark chocolate or colored sprinkles instead of candy melts.
- Add Fillings: Insert a bit of jam or cream cheese in the center for an extra surprise.
- Themed Decorations: Use different candies or edible glitter to match specific themes like spiders or pumpkins!
How to Make Halloween Cake Pops
Step 1: Bake the Cake
Begin by baking your chocolate fudge cake according to the package instructions in a 9×13 pan. Once it’s done, let it cool completely. This step is crucial because if the cake isn’t completely cool, it won’t crumble properly.
Step 2: Make the Frosting
In a large bowl, blend together the butter, shortening, powdered sugar, cocoa powder, and vanilla. Slowly add milk until everything is well combined and smooth. Mixing this frosting creates that fudgy goodness that will hold our cake pops together.
Step 3: Crumble the Cake
Once your cake has cooled down, gently crumble it into fine crumbs using your hands. This texture will help bind everything when we add in our frosting.
Step 4: Combine Cake and Frosting
Gradually add small amounts of frosting to your crumbled cake while mixing with your hands. The mixture should be moist enough to hold its shape when rolled into balls—this is where all that deliciousness comes together!
Step 5: Shape Your Pops
Line a cookie sheet with parchment paper. Using a standard cookie scoop, form tight balls from the mixture and place them on the lined sheet. It’s important to pack them tightly so they don’t fall apart later.
Step 6: Insert Lollipop Sticks
Melt about 1/4 cup of candy melts according to package directions in a small bowl. Dip the end of each lollipop stick into this melted chocolate before inserting it into each ball about three-fourths of the way through. This helps keep everything secure!
Step 7: Chill & Decorate
Place your cookie balls in the freezer for about 30 minutes to firm up. Once chilled, take them out and get creative with your decoration! Melt various colors of candy melts for dipping and use those fun decorations like candy eyeballs and sprinkles.
Enjoy making these delightful Halloween Cake Pops—they’re sure to bring smiles all around!
Pro Tips for Making Halloween Cake Pops
Making Halloween Cake Pops can be a delightful experience, and these tips will help you create the perfect spooky treats every time!
-
Use a quality cake mix: A good chocolate fudge cake mix will ensure your cake pops are moist and flavorful, making them irresistible to anyone who takes a bite.
-
Don’t skip the chilling step: Freezing the cake balls before dipping them in chocolate helps them maintain their shape. This prevents any melting mishaps when they hit the warm candy melts.
-
Melt candy melts carefully: Heat your candy melts in short bursts of 30 seconds in the microwave. Stir between intervals to prevent burning and achieve that smooth, drizzle-ready consistency.
-
Be creative with decoration: Use different colors and sizes of candy melts for a variety of designs. This not only makes your cake pops visually appealing but also adds fun flavors.
-
Store properly: Keep your finished cake pops in an airtight container at room temperature or in the fridge. They can last up to a week, ensuring you can enjoy them throughout the Halloween season!
How to Serve Halloween Cake Pops
Presenting your Halloween Cake Pops can transform these sweet treats into eye-catching displays perfect for any gathering. Here are some fun ideas to make them shine at your party!
Garnishes
- Sprinkles: Add a sprinkle of colored sugar or Halloween-themed sprinkles on top of your dipped cake pops for an extra festive touch.
- Drizzle: Use melted dark or white chocolate to drizzle over the pops for a beautiful contrast and added flavor.
- Edible glitter: For a magical effect, dust some edible glitter on top, turning your cake pops into shimmering delights that catch everyone’s eye.
Side Dishes
- Pumpkin Spice Muffins: These moist muffins infused with pumpkin spice complement the sweetness of cake pops and add a seasonal touch.
- Apple Slices with Caramel Dip: Crisp apple slices paired with creamy caramel dip offer a fresh contrast to the rich sweetness of cake pops.
- Cheese Platter: An assortment of cheeses can balance out the sweetness while providing guests with savory options alongside dessert.
- Mini Pumpkin Pies: Bite-sized pumpkin pies are an excellent way to continue the autumn theme, pairing perfectly with your delicious cake pops.
With these serving suggestions and pro tips, you’re all set to impress your friends and family this Halloween! Enjoy creating and sharing these delightful treats!
Make Ahead and Storage
These Halloween Cake Pops are not only a festive treat but also perfect for meal prep! You can make them ahead of time and store them for later enjoyment. Here’s how to keep them fresh:
Storing Leftovers
- Store cake pops in an airtight container at room temperature for up to 3 days.
- If you prefer to keep them longer, refrigerate them for up to a week.
Freezing
- Place cake pops in a single layer on a baking sheet and freeze until solid.
- Once frozen, transfer them to a freezer-safe bag or container and store for up to 3 months.
Reheating
- If you want to enjoy your cake pops warm, allow them to thaw in the refrigerator overnight.
- For a quick warm-up, place them in the microwave on low power for 10-15 seconds.
FAQs
Here are some common questions about making Halloween Cake Pops!
Can I use different flavors for Halloween Cake Pops?
Absolutely! You can experiment with any cake flavor you love. Vanilla, red velvet, or even pumpkin spice would be delightful choices!
How do I decorate my Halloween Cake Pops?
Get creative! Use melted candy melts for coating and add fun toppings like sprinkles, candy eyeballs, or even drizzle contrasting colors over the top for a spooky effect!
How can I make Halloween Cake Pops vegan-friendly?
To adapt this recipe, you can use plant-based butter and milk alternatives. Replace the egg in the cake mix with applesauce or flaxseed meal mixed with water.
What should I do if my cake pops are falling off the sticks?
Make sure your cake mixture is moist enough to hold its shape. Also, check that your frosting is well-blended and stick the lollipop sticks into melted chocolate before inserting them into the cake balls.
How many Halloween Cake Pops does this recipe make?
This recipe yields about 40 delicious Halloween Cake Pops, perfect for sharing at parties or enjoying as spooky snacks!
Final Thoughts
I hope you’re as excited to make these Halloween Cake Pops as I was! They’re not only festive but also bring a delightful touch of sweetness to any gathering. Whether you’re hosting a party or just looking for a fun treat to share with loved ones, these pops are sure to impress. Enjoy every moment of creating these little masterpieces, and don’t hesitate to get creative with your decorations! Happy baking!
Halloween Cake Pops
Celebrate the spooky season with these delightful Halloween Cake Pops! These fun and festive treats are a crowd-pleaser, combining moist chocolate cake with creamy frosting, all coated in vibrant candy melts. Perfect for kids’ parties, family gatherings, or as a sweet surprise for loved ones, making these pops is an enjoyable activity that everyone can join in on. With easy-to-follow steps and customizable decorations, they can become a cherished tradition in your home. Get ready for a mini party on a stick that’s sure to impress!
- Prep Time: 30 minutes
- Cook Time: 30 minutes
- Total Time: 1 hour
- Yield: Approximately 40 servings 1x
- Category: Dessert
- Method: Baking
- Cuisine: American
Ingredients
- 15 ounces chocolate fudge cake mix (prepared)
- 1/2 cup butter
- 1 cup powdered sugar
- 8 ounces white candy melts
- 8 ounces orange candy melts
- 30 candy eyeballs
- 2 tablespoons shortening
- 1/2 cup cocoa powder
- 1/2 teaspoon vanilla
- 2–3 tablespoons milk
- 10 ounces green candy melts
- 10 ounces black candy melts
- 20 candy corn
- 10 heart sprinkles
- 40 lollipop sticks (6 inch)
- piping bags (or you can use a ziplock bag and cut the corner)
Instructions
- Bake the chocolate fudge cake according to package instructions in a 9×13 pan. Allow it to cool completely.
- In a bowl, combine butter, powdered sugar, and vanilla until smooth. Gradually add milk to achieve desired consistency.
- Crumble the cooled cake into fine crumbs and mix with the frosting until moist enough to form balls.
- Shape into tight balls and place them on a lined cookie sheet. Insert lollipop sticks dipped in melted candy melts into each ball.
- Chill for about 30 minutes before decorating with melted candy melts and fun toppings like candy eyeballs.
Nutrition
- Serving Size: 1 serving
- Calories: 150
- Sugar: 10g
- Sodium: 50mg
- Fat: 6g
- Saturated Fat: 3g
- Unsaturated Fat: 2g
- Trans Fat: 0g
- Carbohydrates: 22g
- Fiber: 1g
- Protein: 2g
- Cholesterol: 15mg

