Pull Apart Garlic Bread Recipe
If you’re looking for a showstopping appetizer or side dish that’s as fun to make as it is to eat, this Pull Apart Garlic Bread Recipe is just what you need! This delicious bread transforms a simple loaf into a flavorful delight. The rich garlicky butter seeps into every nook and cranny, making sure each piece bursts with taste. Whether you’re hosting family gatherings or just enjoying a cozy weeknight dinner at home, this recipe is sure to impress everyone at the table.
What I love most about this pull apart garlic bread recipe is its versatility. It’s perfect for sharing and can be whipped up quickly, meaning you can enjoy warm, gooey goodness in no time!
Why You’ll Love This Recipe
- Super easy to make: With just a handful of ingredients and simple steps, you’ll have a tasty treat ready in under an hour.
- Family-friendly: Everyone loves warm, buttery bread! It’s sure to please both kids and adults alike.
- Perfect for sharing: The pull-apart design makes it an ideal appetizer for parties or family meals.
- Endless flavor options: You can easily customize it with your favorite herbs and cheeses.
- Make-ahead friendly: Prepare it in advance and pop it in the oven when you’re ready to serve!
Ingredients You’ll Need
Making this pull apart garlic bread is a breeze thanks to these simple, wholesome ingredients. You probably already have most of them in your kitchen!
- 1 large round loaf of crusty bread (sourdough works great!)
- 1 cup (2 sticks) unsalted butter, softened
- 8 cloves of garlic (minced)
- 1/4 cup fresh parsley (finely chopped)
- 2 tablespoons fresh chives (finely chopped)
- 1/2 teaspoon salt
- 1/4 teaspoon black pepper
- Optional: 1 cup shredded mozzarella or parmesan cheese
Variations
One of the great things about this recipe is how adaptable it is! Feel free to get creative with flavors based on your preferences or what you have on hand.
- Add some heat: Incorporate red pepper flakes for a spicy kick!
- Cheesy goodness: Swap out the mozzarella for your favorite cheese like gouda or cheddar for a different flavor profile.
- Herb it up: Mix in other fresh herbs like thyme or oregano for added aroma and taste.
- Veggie boost: Add sautéed spinach or sun-dried tomatoes between the cuts for extra flavor and nutrition.
How to Make Pull Apart Garlic Bread Recipe
Step 1: Preheat Your Oven
Start by preheating your oven to 350°F (175°C). This ensures that your garlic bread will bake evenly and come out perfectly golden brown.
Step 2: Prepare the Garlic Butter Mixture
In a bowl, combine the softened butter, minced garlic, chopped parsley, chives, salt, and pepper. Mixing these ingredients together creates that irresistible garlicky spread that makes this recipe so special. Make sure everything is well combined so every bite has that burst of flavor!
Step 3: Cut the Bread
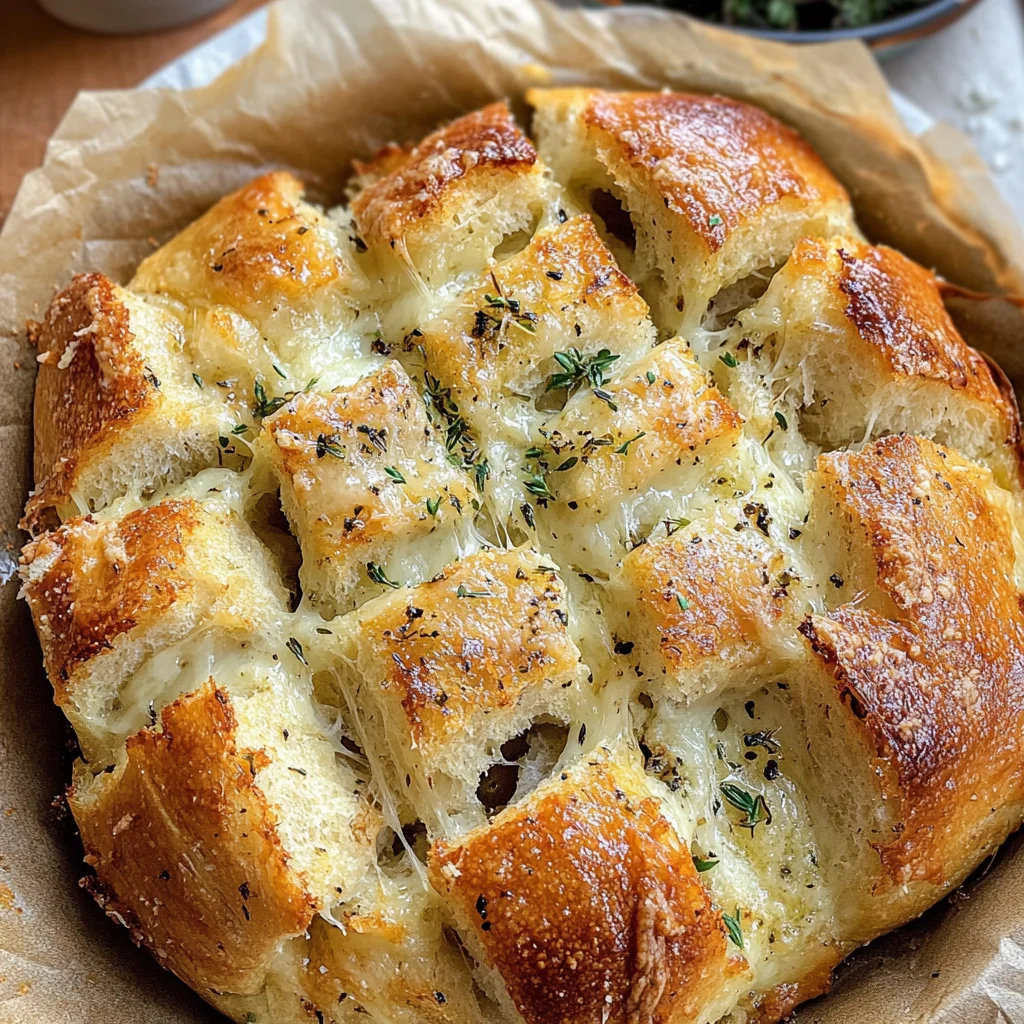
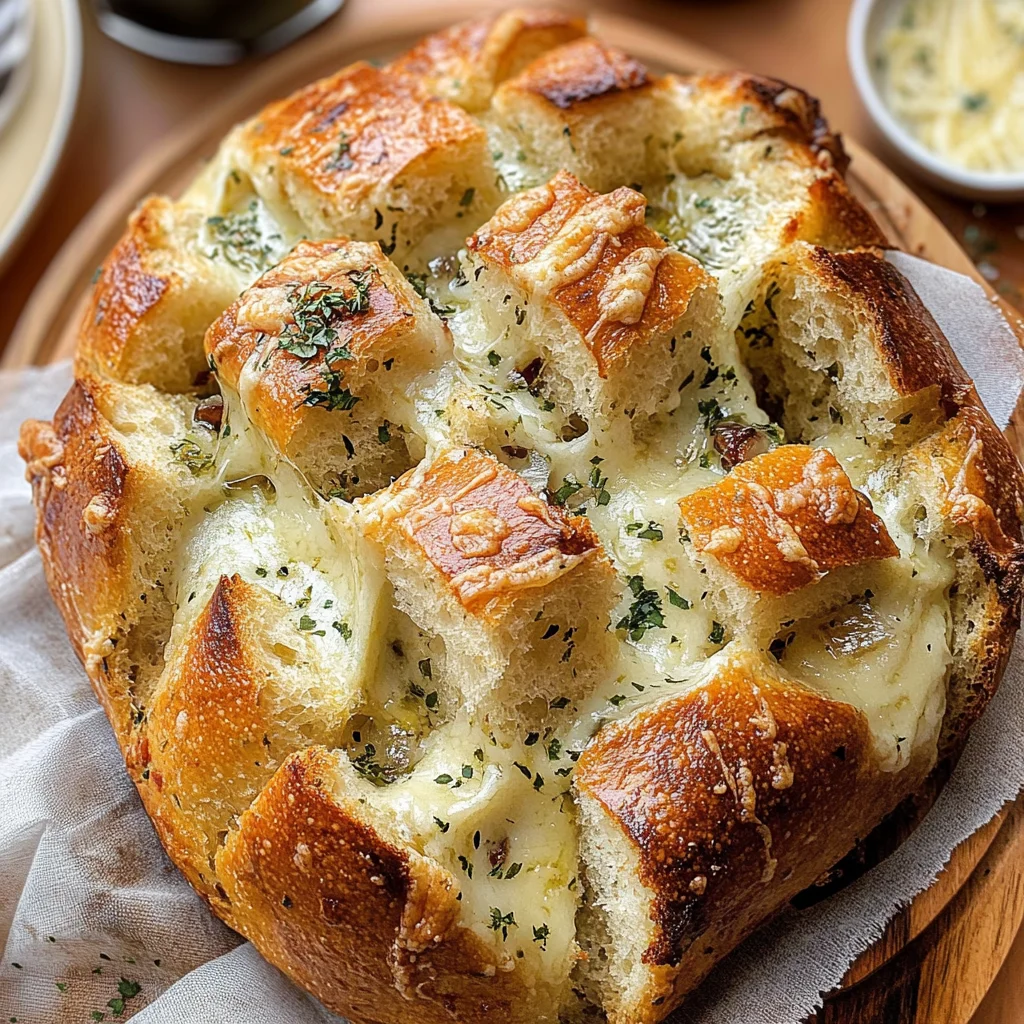
Take your loaf of bread and carefully make diagonal cuts across the top about an inch apart. Be cautious not to cut all the way through; you want the bottom crust intact. This step allows the garlic butter mixture to seep into the bread while keeping all those lovely pieces connected.
Step 4: Create a Crosshatch Pattern
Now rotate the loaf by 90 degrees and make another series of diagonal cuts. This creates a beautiful crosshatch pattern that not only looks stunning but also maximizes every bite’s flavor experience!
Step 5: Spread the Garlic Butter
Using your fingers or a small spatula, gently spread that delicious garlic butter mixture between each cut. Take your time with this step—getting it deep into those crevices means every piece will be flavorful!
Step 6: Add Cheese (Optional)
If you’re using cheese, sprinkle it generously between the cuts. The melted cheese will add extra creaminess and richness to each pull-apart piece.
Step 7: Wrap It Up
Wrap the entire loaf in aluminum foil but leave the top slightly open. This helps create a nice balance between soft interior and crispy exterior while baking.
Step 8: Bake It
Place your wrapped loaf on a baking sheet and bake for about 15-20 minutes. This step allows all those wonderful flavors to meld together beautifully.
Step 9: Crisp Up the Top
After baking, unwrap the foil from the top and let it bake for an additional 5-10 minutes until it’s golden brown and crispy on top. This will give you that perfect texture contrast between crunchy crust and fluffy interior.
Step 10: Serve Warm
Remove from the oven and allow it to cool for just a few minutes before serving warm. Trust me; everyone will be reaching for more as soon as they catch a whiff of that aromatic garlic goodness! Enjoy!
Pro Tips for Making Pull Apart Garlic Bread Recipe
Creating the perfect pull apart garlic bread is all about attention to detail and a dash of love! Here are some pro tips to ensure your bread turns out absolutely divine.
-
Choose the right bread: A crusty round loaf, like sourdough, not only holds up well but also creates that beautiful texture we all crave. The rustic crust adds extra flavor and makes it easier to pull apart.
-
Don’t skimp on the garlic: Using fresh garlic is key to achieving that rich, aromatic flavor. The more you use, the more garlicky goodness you’ll have in every pull!
-
Let it rest: After baking, letting your bread cool for a few minutes helps the flavors meld together beautifully. Plus, it makes handling the hot bread a lot easier!
-
Experiment with herbs: Feel free to swap in or add other fresh herbs like basil or oregano. This can give your garlic bread a unique twist that will surprise your guests.
-
Storage matters: If you have leftovers (which is rare!), wrap them tightly in foil and store at room temperature. Reheat in the oven for a crispy crust that tastes freshly baked!
How to Serve Pull Apart Garlic Bread Recipe
Pull apart garlic bread is not just delicious; it’s also visually stunning! Presenting it well can elevate your dining experience. Here are some ideas on how to serve this delightful dish:
Garnishes
- Fresh parsley: A sprinkle of finely chopped parsley on top adds a burst of color and freshness.
- Chili flakes: A light dusting of chili flakes can give your garlic bread an exciting kick and appeal to spice lovers.
Side Dishes
- Mixed Green Salad: A refreshing salad with mixed greens, cherry tomatoes, and a light vinaigrette complements the richness of the garlic bread perfectly.
- Homemade Marinara Sauce: Serve this alongside for dipping; the tangy tomato flavor pairs beautifully with the buttery garlic.
- Roasted Vegetables: Seasonal roasted veggies not only provide contrast in texture but also balance out the flavors on your plate.
- Creamy Tomato Soup: This classic combo is perfect for cozy nights; dip pieces of your garlicky loaf into warm soup for an irresistible indulgence.
With these tips and serving suggestions, you’re all set to impress family and friends with your pull apart garlic bread! Enjoy every cheesy, garlicky bite!
Make Ahead and Storage
This Pull Apart Garlic Bread Recipe is perfect for meal prep! You can prepare it ahead of time and enjoy the deliciousness whenever you want. Here’s how to store, freeze, and reheat your garlic bread.
Storing Leftovers
- Allow the garlic bread to cool completely before storing.
- Wrap any leftover pieces in plastic wrap or aluminum foil.
- Place wrapped bread in an airtight container or a resealable bag.
- Store in the refrigerator for up to 3 days.
Freezing
- Once cooled, wrap the garlic bread tightly in plastic wrap.
- Then, wrap it again in aluminum foil to prevent freezer burn.
- Label the package with the date and freeze for up to 2 months.
- For best results, thaw in the refrigerator overnight before reheating.
Reheating
- Preheat your oven to 350°F (175°C).
- Unwrap the garlic bread from its packaging.
- Place it on a baking sheet and cover loosely with aluminum foil.
- Bake for about 10-15 minutes until heated through. For a crispy top, remove the foil during the last few minutes.
FAQs
Here are some frequently asked questions that can help you with your Pull Apart Garlic Bread Recipe!
Can I make this Pull Apart Garlic Bread Recipe without cheese?
Absolutely! The garlic butter mixture is flavorful on its own. However, if you want a cheesy twist, feel free to add your favorite non-dairy cheese option!
How do I know when my Pull Apart Garlic Bread is done?
Your Pull Apart Garlic Bread is ready when it’s golden brown on top and crispy. The internal temperature should be warm throughout—about 165°F (74°C).
Can I use different herbs in my Pull Apart Garlic Bread Recipe?
Definitely! Feel free to experiment with other herbs like thyme or oregano. Just make sure they complement the garlic flavor!
What type of bread works best for this Pull Apart Garlic Bread Recipe?
A large round loaf of crusty bread works best—sourdough or Italian bread are excellent choices. They provide a great texture and hold up well when pulling apart.
Final Thoughts
I truly hope you enjoy making this Pull Apart Garlic Bread Recipe as much as I do! It’s not just a dish; it’s an experience meant for sharing with family and friends. Whether it’s for a cozy dinner or a festive gathering, this delightful recipe will surely impress your guests. Happy baking, and may every pull be filled with garlicky goodness!
Pull Apart Garlic Bread
If you’re in search of a delightful appetizer or side dish that’s both easy to make and irresistible, look no further than this Pull Apart Garlic Bread Recipe! This warm, crusty loaf is infused with rich garlic butter and fresh herbs, creating a flavorful experience that will have everyone reaching for more. Perfect for family gatherings or cozy dinners at home, this pull-apart bread is not only fun to make but also versatile enough to adapt to your favorite flavors. With simple ingredients and straightforward steps, you can whip up this crowd-pleaser in under an hour!
- Prep Time: 15 minutes
- Cook Time: 25 minutes
- Total Time: 40 minutes
- Yield: Serves approximately 10 people 1x
- Category: Appetizer
- Method: Baking
- Cuisine: Italian
Ingredients
- 1 large round loaf of crusty bread (sourdough recommended)
- 1 cup unsalted butter, softened
- 8 cloves garlic, minced
- 1/4 cup fresh parsley, finely chopped
- 2 tablespoons fresh chives, finely chopped
- 1/2 teaspoon salt
- 1/4 teaspoon black pepper
- Optional: 1 cup shredded mozzarella or parmesan cheese
Instructions
- Preheat your oven to 350°F (175°C).
- In a bowl, mix softened butter, garlic, parsley, chives, salt, and pepper until well combined.
- Carefully cut diagonal slits in the bread about an inch apart without cutting through the bottom crust.
- Rotate the loaf and create a crosshatch pattern with more diagonal cuts.
- Spread the garlic butter mixture generously between each cut.
- If using cheese, sprinkle it between the cuts.
- Wrap the loaf in aluminum foil loosely and bake on a baking sheet for 15-20 minutes.
- Unwrap the top and bake for an additional 5-10 minutes until golden brown and crispy.
- Let cool slightly before serving warm.
Nutrition
- Serving Size: 1 piece (about 50g)
- Calories: 220
- Sugar: 0g
- Sodium: 250mg
- Fat: 18g
- Saturated Fat: 11g
- Unsaturated Fat: 7g
- Trans Fat: 0g
- Carbohydrates: 15g
- Fiber: 1g
- Protein: 3g
- Cholesterol: 30mg