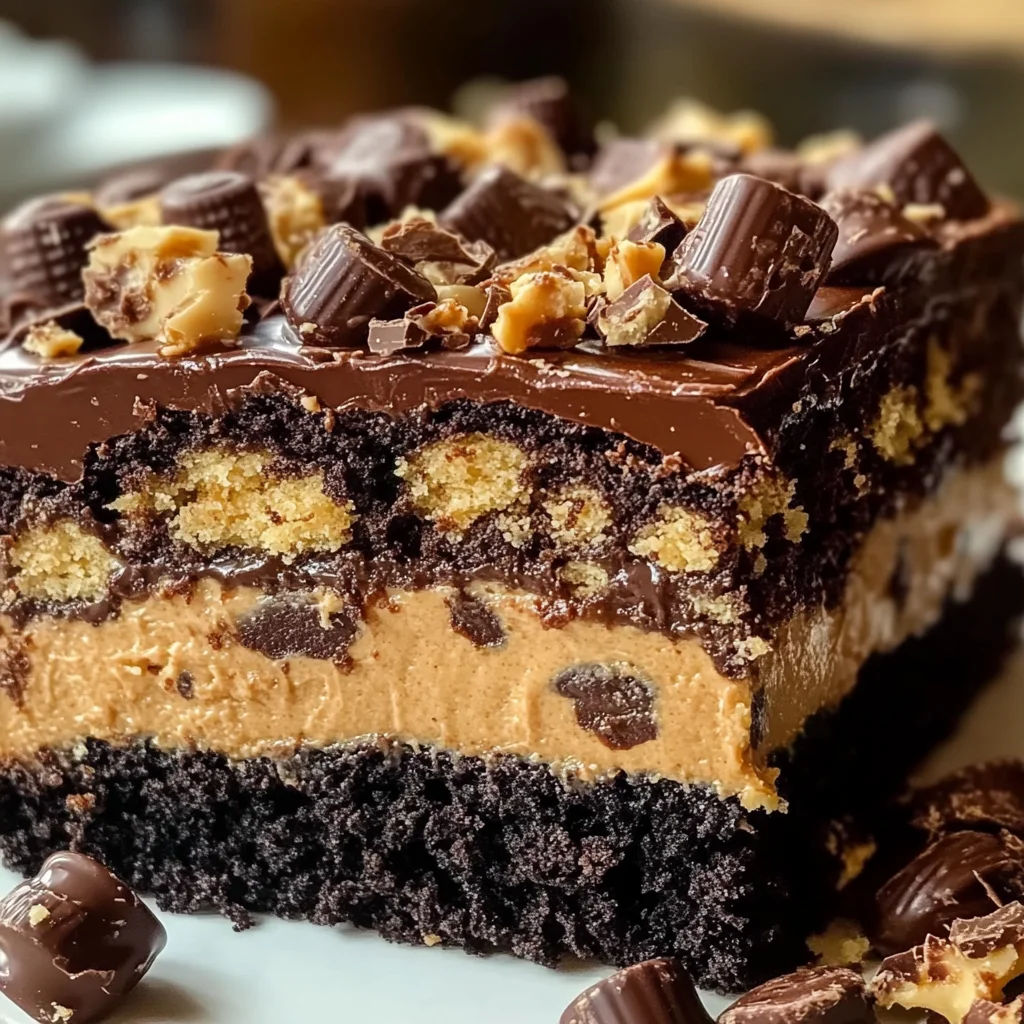
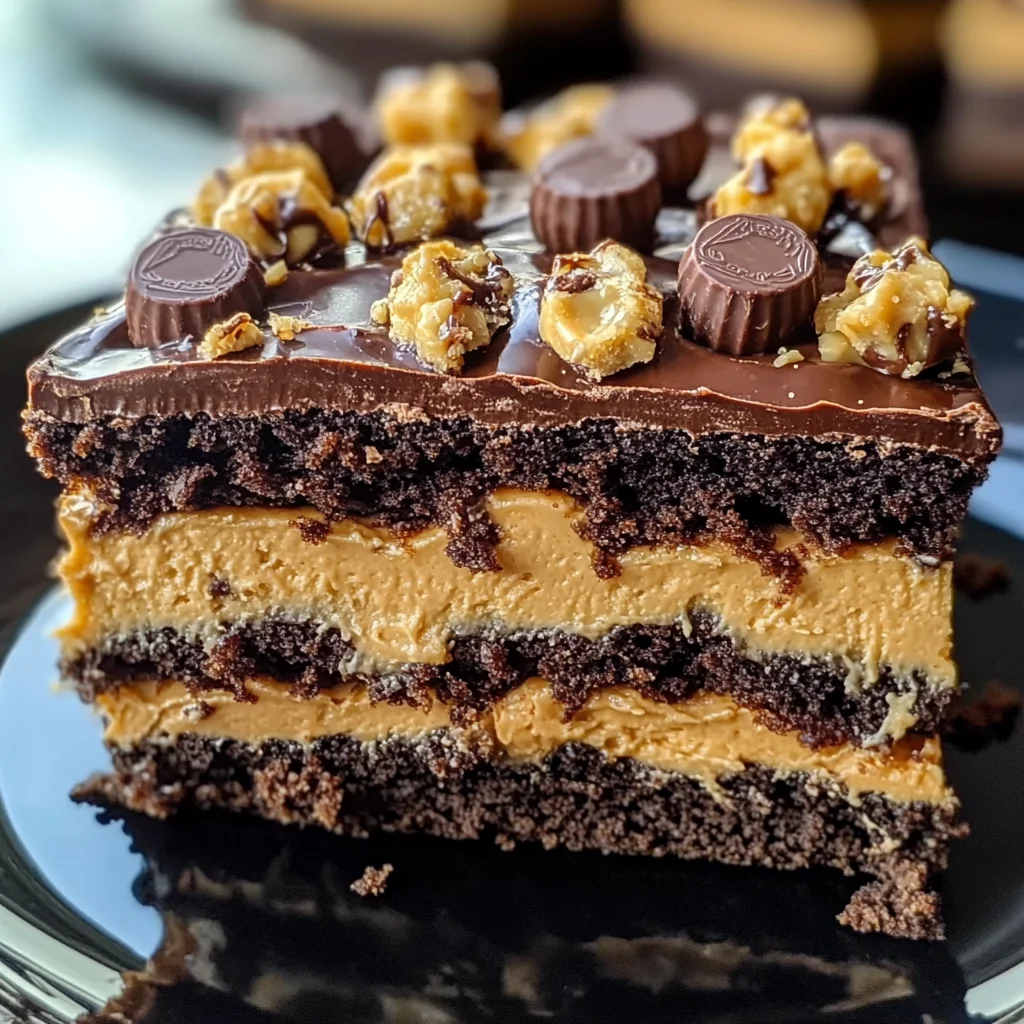
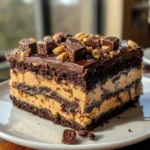
Reese’s Peanut Butter Earthquake Cake
If you’re looking for a dessert that will wow your friends and family, you’ve come to the right place! Reese’s Peanut Butter Earthquake Cake is a delightful combination of rich chocolate and creamy peanut butter, making it an all-time favorite in our home. It’s one of those special treats that brightens up any occasion, whether it’s a busy weeknight or a festive family gathering. Trust me, once you try this cake, you’ll understand why it has a special spot in my heart!
This cake is not only delicious but also super easy to make. It’s the perfect blend of gooeyness and sweetness that everyone will love. Plus, the addition of Reese’s Peanut Butter Cups on top? Pure bliss!
Why You’ll Love This Recipe
- Super easy to prepare: With just a few simple steps, you can whip up this show-stopping dessert in no time!
- Family-friendly appeal: Kids and adults alike adore the combination of chocolate and peanut butter—it’s a guaranteed crowd-pleaser.
- Perfect for any occasion: Whether it’s a birthday party or just a cozy night at home, this cake fits right in.
- Make-ahead convenience: You can bake this cake ahead of time and enjoy it warm or at room temperature later.
- Decadent flavor: The layered center and Reese’s topping create a delightful explosion of flavors that will have everyone coming back for seconds.
Ingredients You’ll Need
Let’s gather some simple, wholesome ingredients to make this indulgent treat! You probably have most of these in your pantry already.
For the Cake
- 1 box chocolate cake mix
- 1 cup water
- 1/2 cup vegetable oil
- 3 large eggs
For the Peanut Butter Layer
- 1 cup creamy peanut butter
- 8 oz cream cheese, softened
- 1/2 cup unsalted butter, melted
- 4 cups powdered sugar
- 1 tsp vanilla extract
Toppings
- 1 cup Reese’s Peanut Butter Cups, chopped
Variations
The best part about this recipe is its flexibility! Feel free to make it your own with these fun variations:
- Add nuts: Toss in some chopped peanuts for extra crunch.
- Try different candies: Swap out Reese’s for your favorite chocolate bar—think Snickers or Butterfinger!
- Mix in some fruit: Add banana slices or strawberries for a fruity twist.
- Go gluten-free: Use gluten-free chocolate cake mix to cater to those with dietary restrictions.
How to Make Reese’s Peanut Butter Earthquake Cake
Step 1: Preheat the Oven
Start by preheating your oven to 350°F (175°C). This step ensures that your cake bakes evenly and comes out perfectly fluffy.
Step 2: Prepare the Cake Batter
In a large bowl, mix together the chocolate cake mix, water, vegetable oil, and eggs until everything is well combined. This batter is going to be the base of our delicious creation! Once mixed, pour it into your greased 9×13-inch baking dish.
Step 3: Make the Peanut Butter Mixture
In another bowl, combine the creamy peanut butter, softened cream cheese, melted butter, powdered sugar, and vanilla extract. Mix until smooth; this rich layer is what makes our cake so decadent!
Step 4: Swirl It Together
Drop spoonfuls of the peanut butter mixture over the top of the cake batter. Using a knife, gently swirl it into the batter. This step creates those beautiful layers we love about an earthquake cake!
Step 5: Add the Toppings
Sprinkle the chopped Reese’s Peanut Butter Cups evenly over the top. This adds an extra boost of flavor and texture that everyone will adore.
Step 6: Bake
Bake your creation for about 35-40 minutes. Check with a toothpick; it should come out mostly clean when it’s ready. Your kitchen will smell heavenly during this time!
Step 7: Cool and Serve
Allow your cake to cool slightly before serving. You can enjoy it warm or let it reach room temperature—either way is delicious!
Now that you have everything you need to create your very own Reese’s Peanut Butter Earthquake Cake, I hope you dive right in! Enjoy every gooey bite!
Pro Tips for Making Reese’s Peanut Butter Earthquake Cake
Creating the perfect Reese’s Peanut Butter Earthquake Cake is all about attention to detail and a little love in the process. Here are some tips to make your baking experience even better:
-
Use room temperature ingredients: Ingredients like eggs and cream cheese mix more thoroughly when they’re at room temperature, leading to a smoother batter and creamier filling.
-
Don’t overmix the batter: Mixing just until combined prevents overdeveloping the gluten in the cake mix, which keeps your cake light and fluffy instead of dense.
-
Swirl gently: When swirling the peanut butter mixture into the chocolate batter, be gentle! This will create beautiful marbled patterns without fully incorporating the two layers.
-
Check for doneness carefully: Ovens vary, so start checking your cake a few minutes before the recommended time. A toothpick should come out with a few moist crumbs—this ensures a gooey center.
-
Let it cool slightly before serving: Allowing the cake to cool for about 10-15 minutes gives it time to set, making it easier to cut and serve while still being deliciously warm.
How to Serve Reese’s Peanut Butter Earthquake Cake
This indulgent cake is sure to impress anyone you serve it to! Here are some fun and creative ideas on how to present this delightful dessert:
Garnishes
- Whipped coconut cream: A dollop of whipped coconut cream adds a light, airy touch that balances the richness of the cake.
- Chocolate drizzle: A simple drizzle of melted dairy-free chocolate over the top creates an eye-catching finish that enhances both flavor and presentation.
Side Dishes
- Vanilla ice cream: A scoop of creamy vanilla ice cream complements the warm cake beautifully, bringing a classic dessert experience.
- Fresh fruit salad: A refreshing mix of seasonal fruits adds brightness and balances out the richness of the cake.
- Chocolate sauce: Serve warm chocolate sauce on the side for those who want an extra indulgent experience with their slice.
- Nutty granola: A sprinkle of nutty granola on top offers added crunch and texture, enhancing each bite of this luscious dessert.
Whether you’re serving it at a party or enjoying it as a sweet treat at home, this Reese’s Peanut Butter Earthquake Cake is bound to be a hit!
Make Ahead and Storage
This Reese’s Peanut Butter Earthquake Cake is perfect for meal prep, making it a fantastic choice for gatherings, potlucks, or simply to enjoy throughout the week. With proper storage, you can savor this indulgent dessert for days!
Storing Leftovers
- Store any leftover cake in an airtight container at room temperature for up to 3 days.
- For longer freshness, refrigerate leftovers; they will last about a week in the fridge.
Freezing
- To freeze, cut the cake into portions and wrap each piece in plastic wrap.
- Place wrapped portions in a freezer-safe container or bag. The cake can be frozen for up to 2 months.
Reheating
- To reheat individual slices, place them on a microwave-safe plate and heat for 15-20 seconds.
- For larger portions, warm in a preheated oven at 350°F (175°C) for about 10 minutes or until heated through.
FAQs
Here are some common questions about making this delicious cake!
Can I make Reese’s Peanut Butter Earthquake Cake without eggs?
Yes! You can substitute eggs with flaxseed meal or applesauce. Use 1/4 cup of applesauce or 1 tablespoon of flaxseed mixed with 2.5 tablespoons of water per egg.
How do I ensure my Reese’s Peanut Butter Earthquake Cake turns out moist?
Make sure not to overbake the cake. Check it at the lower end of the baking time—when a toothpick comes out mostly clean, it’s ready to come out of the oven!
Can I use natural peanut butter for the Reese’s Peanut Butter Earthquake Cake?
Absolutely! Just keep in mind that natural peanut butter may separate, so stir it well before measuring.
What should I serve with Reese’s Peanut Butter Earthquake Cake?
This cake pairs wonderfully with a scoop of dairy-free vanilla ice cream or whipped topping. It adds an extra layer of creaminess to every bite!
Final Thoughts
I hope you find joy in making this Reese’s Peanut Butter Earthquake Cake! It’s truly a special dessert that brings together rich chocolate and creamy peanut butter in every bite. Whether you’re enjoying it at home or sharing it with loved ones, this cake is sure to impress. Happy baking, and don’t forget to share your delicious results with friends and family!
Reese’s Peanut Butter Earthquake Cake
Indulge in the ultimate dessert experience with this Reese’s Peanut Butter Earthquake Cake! This decadent treat perfectly marries rich chocolate with creamy peanut butter, making it a crowd favorite for any occasion. With its gooey center and delightful layers, every bite offers an explosion of flavor that sure to impress family and friends alike. Easy to prepare and versatile, this cake is perfect for birthdays, cozy nights in, or festive gatherings. Whether served warm or at room temperature, it promises a deliciously sweet experience that will have everyone coming back for more.
- Prep Time: 20 minutes
- Cook Time: 40 minutes
- Total Time: 1 hour
- Yield: Serves approximately 12 slices 1x
- Category: Dessert
- Method: Baking
- Cuisine: American
Ingredients
- 1 box chocolate cake mix
- 1 cup water
- 1/2 cup vegetable oil
- 3 large eggs
- 1 cup creamy peanut butter
- 8 oz cream cheese, softened
- 1/2 cup unsalted butter, melted
- 4 cups powdered sugar
- 1 tsp vanilla extract
- 1 cup chopped Reese’s Peanut Butter Cups (or preferred chocolate candy)
Instructions
- Preheat the oven to 350°F (175°C).
- In a large bowl, combine the chocolate cake mix, water, vegetable oil, and eggs until smooth. Pour into a greased 9×13-inch baking dish.
- In another bowl, mix together peanut butter, softened cream cheese, melted butter, powdered sugar, and vanilla extract until creamy.
- Drop spoonfuls of the peanut butter mixture over the cake batter and gently swirl with a knife.
- Sprinkle chopped Reese’s Peanut Butter Cups on top.
- Bake for 35-40 minutes or until a toothpick comes out mostly clean.
- Allow cooling slightly before serving.
Nutrition
- Serving Size: 1 serving
- Calories: 360
- Sugar: 34g
- Sodium: 220mg
- Fat: 18g
- Saturated Fat: 7g
- Unsaturated Fat: 10g
- Trans Fat: 0g
- Carbohydrates: 48g
- Fiber: 2g
- Protein: 6g
- Cholesterol: 30mg